Quantcast
Channel: Mart's Sitecore Art
Viewing all 81 articles
Browse latest View live

Working with Commerce Connect - Getting Started

$
0
0

Introduction

We recently started work on a Sitecore 7.5 commerce solution for a large client of ours where we would implement the shiny, new Commerce Connect 7.5 (Connect) module. 

As a good architect / developer, I consulted with the powers of Google but couldn’t really find a whole lot of good information out there about how to get started. So, this blog series will report what I learned when implementing the module. In this article, I’ll explore the setup process and how to perform a simple test to make sure I can add and retrieve products from the product repository.

It’s not free

It is important to note that unlike its predecessors Sitecore E-Commerce Fundamentals Edition (SEFE) and Sitecore E-Commerce Services (SES), Connect is not free. I am not sure of the actual pricing; you would need to contact a Sitecore sales representative to get the details.

Installation

After downloading Connect 7.5, I went ahead and installed it on my local 7.5 development instance.

Next, I went ahead and set up my product repository and index. I followed Sitecore’s Installation
Guide to get my repository up and running: http://sdn.sitecore.net/upload/sdn5/products/sitecore%20commerce%20connect/7.5/sitecore_connect_75_installation_guide_usletter.pdf 
  

The 3 major steps include:

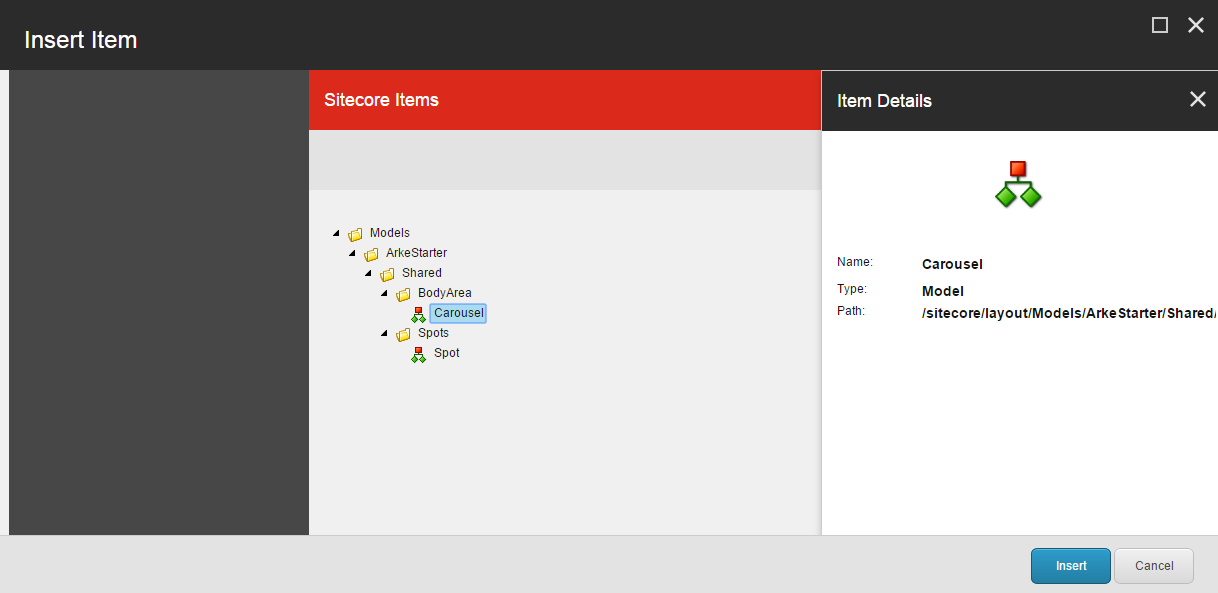
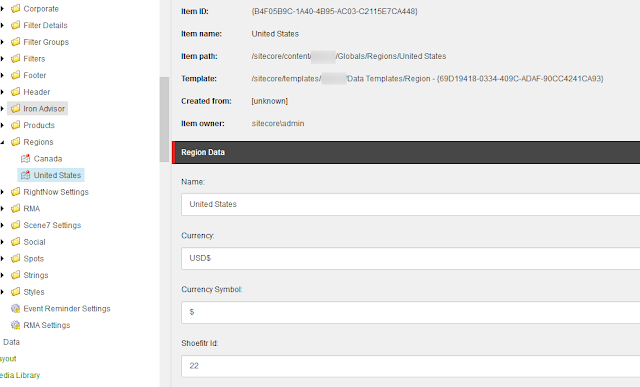
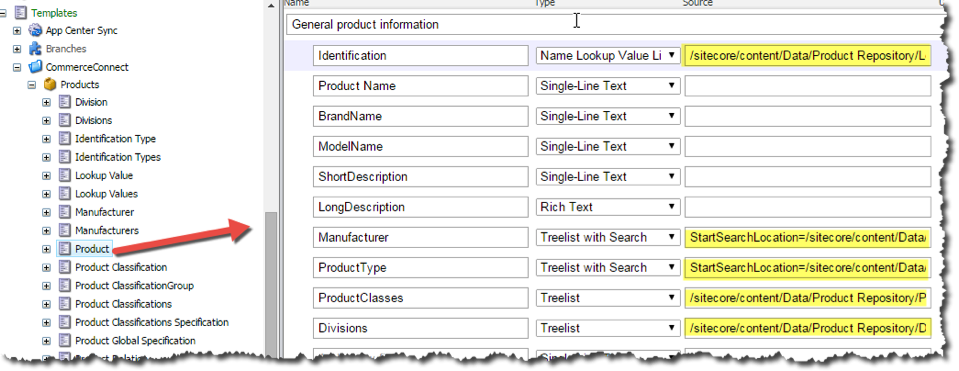
  1. Creating a repository using the Templates/Branches/CommerceConnect/Products/Product Repository branch. I set mine up at the following path:
    /sitecore/content/Data/Product Repository/Products

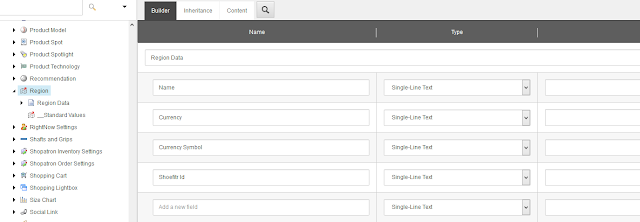
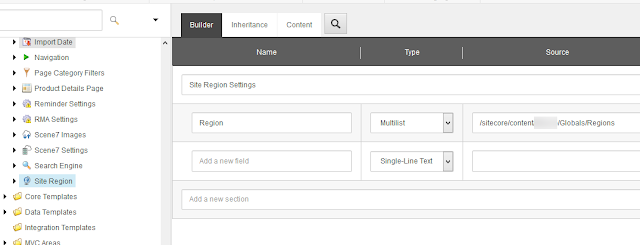
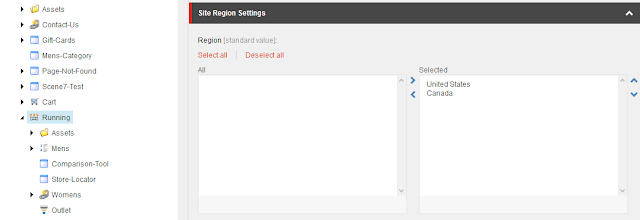
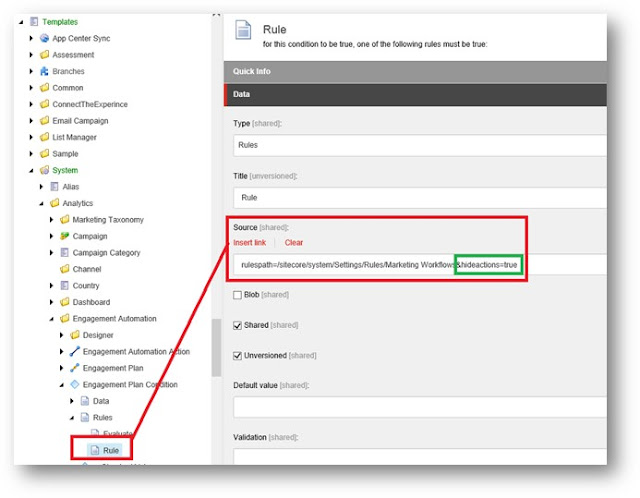
  2. Updating the search Source for the Manufacturer and ProductType fields of the Product template

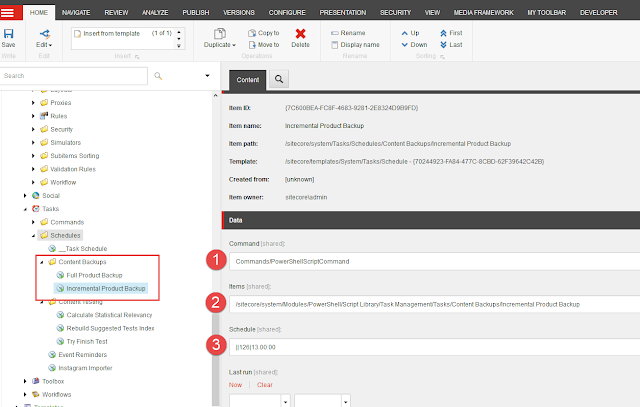
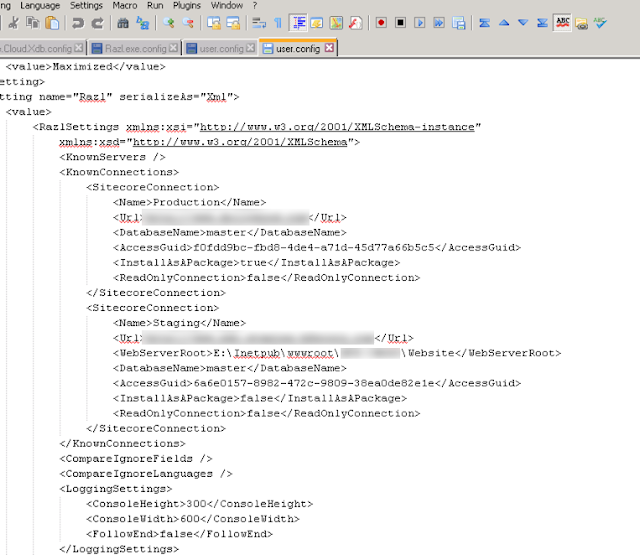
  3. Modifying the necessary settings in the config files to let the module know where my new  repository is located in the content tree. Files and locations to update include:    
     
    Sitecore.Commerce.Products.config


    Sitecore.Commerce.Products.Lucene.Index.Master.config AND Sitecore.Commerce.Products.Lucene.Index.Web.configs


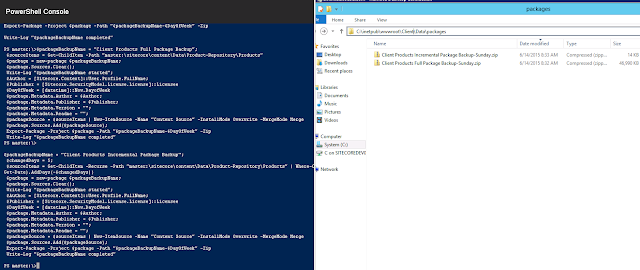
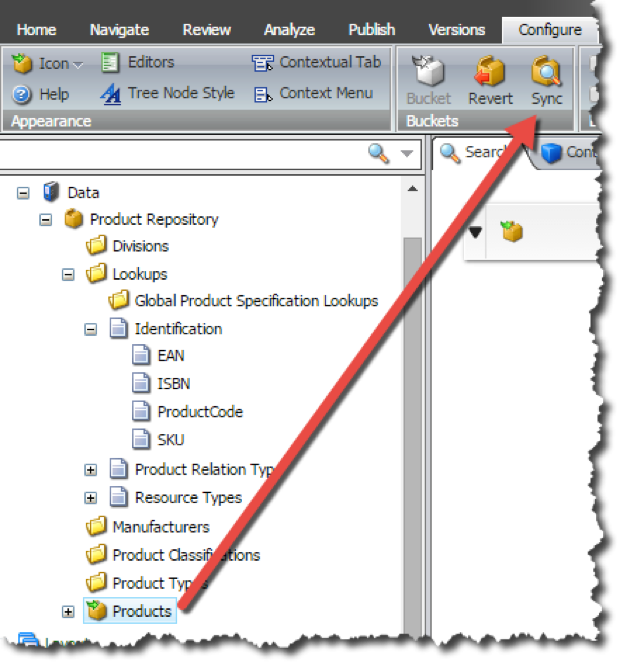
      With that behind me, I needed to go ahead and sync my product repository bucket before using it for the first time:


Pulling out a product

Ok, so according to the documentation, I should be ready to roll and can start throwing products into my repository where I can access them using the Sitecore search API.

In the final solution, I want to pull a product out of the repo by product name, because I intend to have a MVC route that will have the product name hanging off the end. Something like this: running/mens/running-shoes/support/wave-inspire-11

With that being said, let me write some code and give it a test.

POCO

The first thing that I need to do is create a POCO that is consumable by the LINQ layer within Sitecore. I have to make sure that I inherit from SearchResultItem:

 public class ProductSearchResultItem : SearchResultItem  
{
public string BrandName { get; set; }
public string ExternalID { get; set; }
public string Divisions { get; set; }
public string FullDescription { get; set; }
public string Identification { get; set; }
public string Manufacturer { get; set; }
public string ModelName { get; set; }
public string Product_Name { get; set; }
public string ProductClasses { get; set; }
public string ProductType { get; set; }
public string Short_Description { get; set; }
}

GetProduct Method

Next, I want a method that will take a product name as a parameter, and return the actual Sitecore item from my repository. In my case, I am using Glass Mapper as my ORM of choice. If you are still writing your classes by hand, or are using Custom Item Generator to generate your template based classes, I highly recommend that you look into using Glass.


 public Product GetProduct(string productName)  
{
var index = Settings.Indexes.GetIndex("products");
using (var context = index.CreateSearchContext())
{
IQueryable<ProductSearchResultItem> query = context.GetQueryable<ProductSearchResultItem>()
.Where(
resultItem =>
resultItem.TemplateId == IProductConstants.TemplateId &&
resultItem.Product_Name.Equals(productName, StringComparison.InvariantCultureIgnoreCase) &&
resultItem.Name != "__Standard Values");
SearchResults<ProductSearchResultItem> results = query.GetResults();
var queryResults = results.Hits.Select(hit => hit.Document.GetItem());
return queryResults.Any() ? queryResults.FirstOrDefault().GlassCast<Product>() : null;
}
}


This is what my code looks like that will actually implement the method (some ugly hard-coded values, but remember that this is simply a test):

 var myProduct = new ProductManager().GetProduct("Test Product");  

Creating a Test Product

For the final piece of the puzzle, I need to add a test product to my repository.
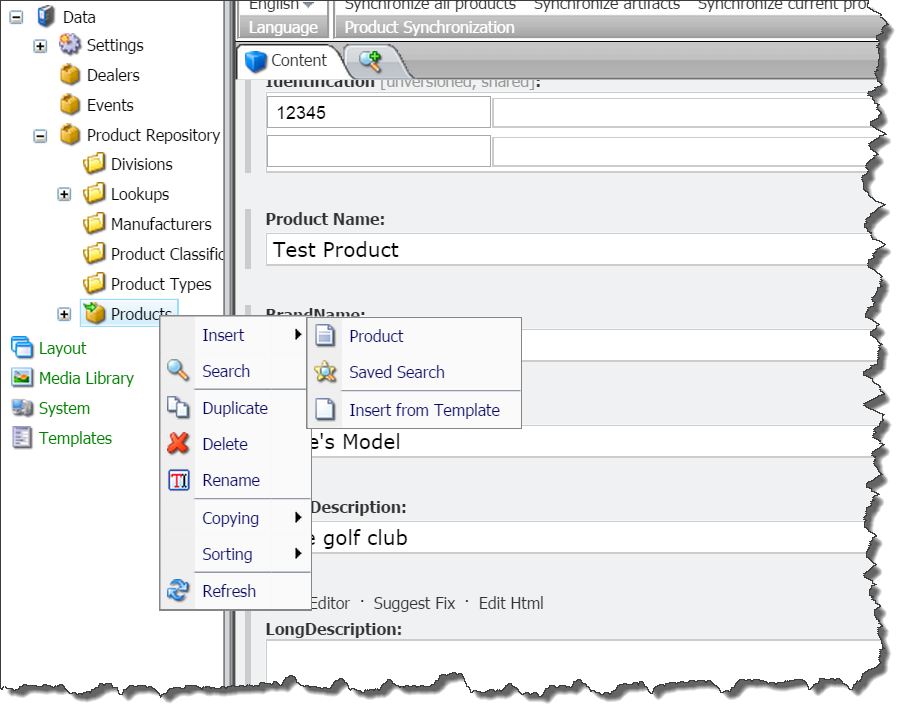

Run it!

In my test, I slapped together a quick controller rendering as we are using MVC for the project. If you are using Web Forms, you would simply throw this onto a Layout or Sublayout.

The breakpoint below the line where I called my method confirmed that I am cooking with grease!


In Summary

I was successfully able to:

  1. Install and configure Commerce Connect.
  2. Add a product to the product repository.
  3. Write some code to pull the product out of the repository by product name using the Sitecore.ContentSearch API.
In my next post, I will be showing how to work the Commerce Connect cart, so watch this space.

Happy Coding!

Sitecore 8 - Taking the Leap

$
0
0
We made the decision to upgrade one of our current projects from Sitecore 7.5 to the newly released 8. As the architect, it was my job to make sure that all that we had built so far, transitioned smoothly over to the new version.

All of our code and serialized Sitecore items were safely within our Git Repository in the VisualStudio.com cloud.

These are the steps that I took in our upgrade process:
  1. Uninstalled Sitecore 7.5
  2. Deleted the leftover files in my 7.5 instance location in wwwroot
  3. Downloaded and installed 8.0 from dev.sitecore.net (it's not actually on SDN, which was interesting). I gave my 8.0  instance the same name as my 7.5, just to make things easier when syncing things back up using  Team Development for Sitecore (TDS).
  4. Downloaded and installed the modules that we are using. In this case, I downloaded and installed the Commerce Connect 7.5 module.
  5. Updated our Sitecore referenced assemblies to the new versions. We use a hosted NuGet server, so I created a new Sitecore 8 references package and then updated my packages.config files within my solution's projects.
  6. Pulled the updated Web.config into my solution and made sure that my config transformations were in place.
  7. Synced up my Sitecore instance using the TDS projects and did a build to my instance.
Everything seems to be working like a champ! I did notice that the new version took an abnormally long time to start up for the first time.

Experience / Page Editor Changes

So after getting one of my test pages loaded up within the Experience Editor, I noticed that my inline editing didn't seem to be working when I clicked the Edit button.

While exploring the newly designed ribbon, I noticed an "Editing" checkbox in the "View" tab that is turned off by default.  Checking this box, made my experience editor come to life, and I was a happy camper!


Configuring Sitecore xDB using Rackspace's ObjectRocket platform

$
0
0
As all of us in the Sitecore community are aware, one of the major changes in Sitecore 7.5 and 8 is MongoDB, the new architectural component in Sitecore’s xDB.

If you are starting to work with these newer versions of Sitecore, you will be asked by your clients about the options to consider when deploying and supporting MongoDB.

We at Arke have had tremendous success implemented MongoDB using Rackspace’s ObjectRocket platform. There are however a few tricks to get it configured that I will cover in this post.

The post assumes that you already have an ObjectRocket account. If you don't, go ahead and sign up for their 30 day trial.

Creating a New Instance

Click on the "Add Instance" button within your account's "Instances" dashboard, and then give your instance a name. Make sure that "MongoDB" is selected as the engine, and select the plan that suits your needs.


Adding an Instance User

After your newly created instance is up and running, go ahead and create a new instance user by clicking on the "Actions" button and then "Add User" link.

Note

Something to keep in mind is that we will be using the same credentials that we set up for our instance user, for our Sitecore databases. So once you create the user, keep the username and password handy.


Making the Connection

Within the Instance Details view, you will see that you have a couple of connection strings and an API key. We obviously want to have a secure connection, so we will be using the SSL Connect String.


ConnectionStrings.config

The next thing you want to do is set up the connection strings to point to your new instance. So you want to crack open your ConnectionString.config file, and add the necessary information.

Your new strings will look something like this:

<add name="analytics" connectionString="mongodb://mongouser:mongopassword@iad-mongos2.objectrocket.com:xxxx/analytics?ssl=true"/>  
<add name="tracking.live" connectionString="mongodb://mongouser:mongopassword@iad-mongos2.objectrocket.com:xxxx/tracking_live?ssl=true"/>
<add name="tracking.history" connectionString="mongodb://mongouser:mongopassword@iad-mongos2.objectrocket.com:xxxx/tracking_history?ssl=true"/>

Looking at the strings above, mongouser and mongopassword represent the credentials that you set up for your instance user. The port and url (iad-mongos2.objectrocket.com:xxxx) come from your instance's SSL Connect String.

Cranking up the Databases

At this point, we are ready to fire up Sitecore, and let it auto-provision the necessary MongoDB databases.

When Sitecore has finished "booting up", you will notice that the databases have been created in your instance, but they are empty. That's because you need to create a user account for each of the databases, so that Sitecore can start dumping data into them:


Creating Database Users

The final step is to add a user to each of the newly created databases that has the same credentials that we set up for our instance user in the Adding an Instance User step.

Simply click on the various database names on your instance details page, and then click the "Add User" button located in the user's section of the database details page.


Mongo Likey!

After you have added the users to each of the Mongo databases, you will notice that the collections will be created and that the data will start getting populated.


Troubleshooting

If your databases don't get created, or data doesn't start getting populated in them, make sure that you check your Sitecore logs as they will reveal any errors while trying to connect to the ObjectRocket instance.


My Upgrade Experience from Sitecore 7.5 to 8.0 Update-1

$
0
0
I was assigned the task of upgrading an existing client's large, multisite Sitecore 7.5 rev. 141003 instance to the shiny new Sitecore 8 rev.150121 (Update-1).  Having performed several version upgrades in the past, I estimated that it would take me about half a day to complete this process.

It took me a little longer than this to get them up and running, only because I ran into some issues with some legacy modules and because rebuilding the search indexes simply took forever!

I am still having a couple of issues after the upgrade that I noted in my Outstanding Issues section. I plan to keep this section updated as I receive feedback from the ticket I currently have open with Sitecore.

Solution for publishing error.
Solution for error when rebuilding links database.


Getting Ready

To get started, I navigated over to the new and improved dev.sitecore.net site to arm myself with the files needed to perform the upgrade. The files that I downloaded from the site included:

  1. 8.0 and 8.0 Update-1 upgrade packages
  2. 8.0 and 8.0 Update-1 config files for upgrade
  3. Upgrade guides for 8.0 and 8.0 Update-1
  4. Configuration file changes document for 8.0 and 8.0 Update-1
Note: You need to be logged into dev.sitecore.net for these links to work.

I must say, the Sitecore team did a fantastic job on the documentation for the upgrade!

The road to 8.0 initial release

The short version

These are the steps necessary to perform the upgrade:

  1. Run SQL Server update scripts on Core, Master and Web databases
  2. Run SQL Server script on Analytics database
  3. Remove PageEditorHanldeNoLayout Processor from web.config
  4. Remove PageLevelTestItemResolver from Analytics.config
  5. Turn Analytics off: Set Analytics.Enabled to false in Analytics.config
  6. Make sure any A/B or MV tests are disabled
  7. Disable WFFM and ECM config files if you have the modules installed
  8. Install the upgrade package using the Update Installation Wizard
  9. Apply the configuration file changes described in Sitecore Configuration File Changes document
  10. Revert the changes from step 5-7

Web.Config

The configuration file changes document for 8.0 scared me at first, because it was 30 pages! But, I quickly realized that in most cases, I could simple do a copy and replace on most of the files.

The document notes; "Most customers have only applied a small number of changes (if any) to the Web.config file. In that case, we recommend that you simply download the clean config file using the link above and re-apply any changes that you've made to save time and to reduce the risk of making mistakes when adding the new settings, pipelines, etc. to the file."

We inherited this site from another vendor who made their updates directly to the web.config, instead of using separate patch files. So unfortunately, the small number of changes didn't apply to our case. I was forced to manually update the web.config in 36 different locations!

Bump in the road

While installing the upgrade package, I received the following error:
Installation resulted in "The following errors occured during file installation: Access to the path '{instancepath}\Website\bin\System.Web.Http.dll' is denied."

For some reason, the assembly in question was marked as "read-only". I simply unchecked the "read-only" checkbox in the file's properties, ran the upgrade package again, and it worked like a champ.

Testing 8.0 initial release

After updating the databases via scripts, installing the update package, and making the necessary config changes, I was ready to boot up the new version.

At first, things looked good. The new login page came up and I was able to successfully get to the new SPEAK dashboard.

However, when I clicked on any the buttons on the dashboard, I received the following error:
Could not load type 'Sitecore.Shell.Applications.WebEdit.Commands.WebEditCommand' from assembly 'Sitecore.Client, Version=7.0.0.0, Culture=neutral, PublicKeyToken=null'.

Experience told me that there had to be some custom module causing the issue. Knowing that this particular site was using a "patched" version of the old 6.5 calendar module, I disabled the config file straight away, tried again, but still didn't have any luck. Other modules that the site used that I tried to disable without success included:

  1. Sitemap XML
  2. Page Rate
I decided to make a backup of everything in my instance's include folder, and then I went back over to dev.sitecore.net and downloaded the zipped web root of the 8.0 initial release. I went ahead and removed everything that was in my instance's include folder, and then copied over all the files from the 8.0 zipped download's include folder.

This fixed my problem, and I was able to access all the areas of the platform. I also did a quick check in my log file, and it was error free.

Next, I loaded in the above-mentioned module's config files into my include folder. I kept my fingers and toes crossed, and to my delight, everything continued to work.

To 8.0 Update-1 and beyond

After getting the initial release up and running, I figured that upgrading to Update-1 would be a "walk in the park". It certainly was.

The short version

These are the steps necessary to perform the upgrade:

  1. Turn Analytics off: Set Analytics.Enabled to false in Analytics.config
  2. Disable WFFM and ECM config files if you have the modules installed
  3. Comment out the Sitecore.ContentTesting.Events.GenerateScreenshot,Sitecore.ContentTesting
    event handler in /App_Config/Include/ContentTesting/Sitecore.ContentTesting.config
  4. Install the upgrade package using the Update Installation Wizard
  5. Apply the configuration file changes described in Sitecore Configuration File Changes document
  6. Revert the changes from step 1-3
I was presently surprised to see that there was only 1 change to the web.config this time. As for the rest of the configuration files; I was able to simply do a copy and replace from the config files zip that I had previously downloaded.

Outstanding Issues

After doing some extensive testing, these are the following issues that are outstanding in our upgraded 8.0 Update-1 instance. 

I plan to keep this section updated with feedback from the ticket I currently have open with Sitecore.

Error when rebuilding the links database for Master and Web:

Job started: RebuildLinkDatabasesIndex|System.FormatException: Unrecognized Guid format.
   at System.Guid.GuidResult.SetFailure(ParseFailureKind failure, String failureMessageID, Object failureMessageFormatArgument, String failureArgumentName, Exception innerException)
   at System.Guid.TryParseGuid(String g, GuidStyles flags, GuidResult& result)
   at System.Guid..ctor(String g)
   at Sitecore.Analytics.Data.TrackingField.<>c__DisplayClass21.<get_Events>b__20(XElement e)
   at System.Linq.Enumerable.WhereSelectEnumerableIterator`2.MoveNext()
   at Sitecore.Analytics.Data.TrackingField.ValidateLinks(LinksValidationResult result)
   at Sitecore.Links.ItemLinks.AddLinks(Field field, List`1 links, ItemLinkState linkState)
   at Sitecore.Links.ItemLinks.GetLinks(ItemLinkState linkState, Boolean allVersions, Boolean includeStandardValuesLinks)
   at Sitecore.Links.LinkDatabase.UpdateReferences(Item item)
   at Sitecore.Links.LinkDatabase.RebuildItem(Item item)
   at Sitecore.Links.LinkDatabase.RebuildItem(Item item)
   at Sitecore.Links.LinkDatabase.RebuildItem(Item item)
   at Sitecore.Links.LinkDatabase.RebuildItem(Item item)
   at Sitecore.Links.LinkDatabase.RebuildItem(Item item)
   at Sitecore.Links.LinkDatabase.RebuildItem(Item item)
   at Sitecore.Links.LinkDatabase.RebuildItem(Item item)
   at Sitecore.Links.LinkDatabase.Rebuild(Database database)
   at Sitecore.Shell.Applications.Dialogs.RebuildLinkDatabase.RebuildLinkDatabaseForm.Builder.Build()|Job ended: RebuildLinkDatabasesIndex (units processed: )


Resolution:

WFFM problem items were causing the errors.

Using SQL Profiler, we identified the problem items:

/sitecore/system/Modules/Web Forms for Marketers/Sample form
/sitecore/system/Modules/Web Forms for Marketers/Website
/sitecore/templates/Web Forms for Marketers/Form/_Standard Values

The site had the module installed but wasn't using it for anything. I think our client had intentions to start building some custom forms, but just never got around to doing it.

Knowing that we will be using it in the near future for a Dynamics CRM integration project, I went ahead and installed the latest version of the module, overwriting the problem items in the tree.

After doing this, I was able to successfully rebuild my links databases. Yay!

Error when publishing some items:

Job started: Publish to 'web'|#Exception: System.Reflection.TargetInvocationException: Exception has been thrown by the target of an invocation. ---> System.Exception: Could not resolve type name: Sitecore.Publishing.Pipelines.PublishVersion.Processors.Re
                                moveOtherVersions, Sitecore.Kernel (method: Sitecore.Configuration.Factory.CreateType(XmlNode configNode, String[] parameters, Boolean assert)).
   at Sitecore.Diagnostics.Error.Raise(String error, String method)
   at Sitecore.Configuration.Factory.CreateType(XmlNode configNode, String[] parameters, Boolean assert)
   at Sitecore.Configuration.Factory.CreateFromTypeName(XmlNode configNode, String[] parameters, Boolean assert)
   at Sitecore.Configuration.Factory.CreateObject(XmlNode configNode, String[] parameters, Boolean assert, IFactoryHelper helper)
   at Sitecore.Pipelines.CorePipelineFactory.GetObjectFromType(String type, XmlNode processorNode)
   at Sitecore.Pipelines.CoreProcessor.GetMethod(Object[] parameters)
   at Sitecore.Pipelines.CorePipeline.Run(PipelineArgs args)
   at Sitecore.Publishing.PublishHelper.PublishVersionToTarget(Item sourceVersion, Item targetItem, Boolean targetCreated)
   at Sitecore.Publishing.Pipelines.PublishItem.PerformAction.ExecuteAction(PublishItemContext context)
   at Sitecore.Publishing.Pipelines.PublishItem.PerformAction.Process(PublishItemContext context)
   at (Object , Object[] )
   at Sitecore.Pipelines.CorePipeline.Run(PipelineArgs args)
   at Sitecore.Publishing.Pipelines.PublishItem.PublishItemPipeline.Run(PublishItemContext context)
   at Sitecore.Publishing.Pipelines.Publish.ProcessQueue.ProcessEntries(IEnumerable`1 entries, PublishContext context)
   at Sitecore.Publishing.Pipelines.Publish.ProcessQueue.Process(PublishContext context)
   at (Object , Object[] )
   at Sitecore.Pipelines.CorePipeline.Run(PipelineArgs args)
   at Sitecore.Publishing.Pipelines.Publish.PublishPipeline.Run(PublishContext context)
   at Sitecore.Publishing.Publisher.PublishWithResult()
   --- End of inner exception stack trace ---
   at System.RuntimeMethodHandle.InvokeMethod(Object target, Object[] arguments, Signature sig, Boolean constructor)
   at System.Reflection.RuntimeMethodInfo.UnsafeInvokeInternal(Object obj, Object[] parameters, Object[] arguments)
   at System.Reflection.RuntimeMethodInfo.Invoke(Object obj, BindingFlags invokeAttr, Binder binder, Object[] parameters, CultureInfo culture)
   at System.Reflection.MethodBase.Invoke(Object obj, Object[] parameters)
   at (Object , Object[] )
   at Sitecore.Pipelines.CorePipeline.Run(PipelineArgs args)
   at Sitecore.Jobs.Job.ThreadEntry(Object state)


Resolution:

Error in the web.config file:

       <publishVersion help="Processors should derive from Sitecore.Publishing.Pipelines.PublishItem.PublishVersionProcessor">
<processor
type="Sitecore.Publishing.Pipelines.PublishVersion.Processors.Re
moveOtherVersions, Sitecore.Kernel" />
</publishVersion>

You should concatenate the rows with the type name:

       <publishVersion help="Processors should derive from Sitecore.Publishing.Pipelines.PublishItem.PublishVersionProcessor">
<processor
type="Sitecore.Publishing.Pipelines.PublishVersion.Processors.RemoveOtherVersions, Sitecore.Kernel" />
</publishVersion>

Frustrated by hidden buttons when adding links in Sitecore 8?

$
0
0

Is anyone else constantly frustrated by the above picture?


In your site’s wwwroot folder, go to /Website/Sitecore/shell/client/speak/Assets/css/ and find the speak-default-theme.css file.

Edit the file by adding the following class:

 .sc-dialogFooter {
z-index: 1050;
}

Make sure you clear your browser cache.

Voila! Your buttons are back!


Enable HTML tags in Single-line or Multi-line text fields - an oldie but a goodie

$
0
0
This comes up time and time again. When upgrading older 6.x Sitecore solutions to 7 and now 8, some content areas seem to be broken because html tags start being rendered on pages.

Why?

The GetTextFieldValue processor that was added to the renderField pipeline in 7 and above ensures that all text fields are output escaped when rendered through the renderField pipeline.

Yes, this is actually a really good security mechanism. However, if you have tech savvy Content Authors, you may want to turn this off.

This processor will help you do just that.

Code

The key is the HttpUtility.HtmlDecode on line 20 below:

1:  using System.Web;  
2: using Sitecore.Diagnostics;
3: using Sitecore.Pipelines.RenderField;
4: namespace MyProject.Framework.Pipelines.RenderField
5: {
6: /// <summary>
7: /// The get text field value.
8: ///
9: /// </summary>
10: public class CustomGetTextFieldValue
11: {
12: public void Process(RenderFieldArgs args)
13: {
14: Assert.ArgumentNotNull((object)args, "args");
15: string fieldTypeKey = args.FieldTypeKey;
16: if (fieldTypeKey != "text"&& fieldTypeKey != "single-line text")
17: {
18: return;
19: }
20: args.Result.FirstPart = HttpUtility.HtmlDecode(args.Result.FirstPart);
21: }
22: }
23: }

Config file for your include folder

<configuration xmlns:patch="http://www.sitecore.net/xmlconfig/">  
<sitecore>
<pipelines>
<renderField>
<processor type="MyProject.Framework.Pipelines.RenderField.CustomGetTextFieldValue, MyProject.Framework"
patch:instead="processor[@type='Sitecore.Pipelines.RenderField.GetTextFieldValue, Sitecore.Kernel']" />
</renderField>
</pipelines>
</sitecore>
</configuration>


Syncing xDB Experience Profiles with Dynamics CRM

$
0
0

Intro and Prerequisites

Like other Sitecore enthusiasts, I have been extremely impressed with the new technology and architecture behind xDB

As Nick Wesselman puts it: "The Experience Database provides data structures and APIs to allow you to track an individual across devices, provided you can identify him/her by some unique identifier such as an email address. This is key, otherwise you just end up having a ton of anonymous contacts in your database."

If you haven't read his blog, I highly recommend it. It got me on the right path with all things xDB / Mongo: http://www.techphoria414.com/Blog

Reading through his "One Month with Sitecore 7.5, Part 5: Persisting Contact Data to xDB" post where he talks about Contact Facets will help you better understand what I am doing below.

Also make sure you check out Martina Welander's posts as well: http://sitecore-community.github.io/docs/documentation/xDB/Facets/. She has tons of good stuff in there.

The Goal

As you can see, the code for identifying a user is straightforward:

1:  var tracker = Sitecore.Analytics.Tracker.Current;  
2: if (tracker == null || !tracker.IsActive || tracker.Contact == null)
3: {
4: return;
5: }
6: tracker.Session.Identify("some unique identifier");

This is nice and all, but it doesn't help with populating my Experience Profile (xFile).

Wouldn't it be awesome if I could identify the user, and then check my CRM system to see if it contained profile data about the user, and if so, populate the xFile using that information?

Wouldn't it be even more awesome if after I identified the user, I could make sure that my xFile always kept in sync with my CRM system?

Having extensive Dynamics CRM development experience, I decided to write up a POC to make this happen.

NOTE: What I am doing here is a one-way sync from Dynamics CRM to Sitecore. We could very easily take this one step further with a more advanced contact form, and update data in CRM from Sitecore.


Identify User and Flush-To-Mongo Control

My first task was to put together a user control that would allow me to identify the user and then flush the session data to Mongo so that I could review the outcome.

The basic control consisted of 1 text box and 2 buttons. The text box would be used to capture the user's email address. Clicking the first button would identify the user using the code shown above, while clicking the second button would flush the session data to Mongo.

Flushing the session data can be achieved by simply making a call to end the session: Session.Abandon()

Here is the code-behind for my control:

1:   public partial class IdentifyUser : System.Web.UI.UserControl  
2: {
3: private void Page_Load(object sender, EventArgs e)
4: {
5: btnIdentifyUser.Click += btnIdentifyUser_Click;
6: btnFlushToMongo.Click += btnFlushToMongo_Click;
7: lblIdentiedUser.Text = Tracker.Current.Contact.Identifiers.Identifier;
8: }
9: private void btnIdentifyUser_Click(Object sender, EventArgs e)
10: {
11: Tracker.Current.Session.Identify(txtCurrentUser.Text);
12: string myScript = "alert('Done!');";
13: Page.ClientScript.RegisterStartupScript(GetType(), new Guid().ToString(), myScript, true);
14: }
15: private void btnFlushToMongo_Click(Object sender, EventArgs e)
16: {
17: Session.Abandon();
18: string myScript = "alert('Flushed!');";
19: Page.ClientScript.RegisterStartupScript(GetType(), new Guid().ToString(), myScript, true);
20: }
21: }

Nothing elegant about this at all (especially because I used WebForms over MVC). I simply slapped this on the out-of-the-box Sitecore demo page and the result looked like this:


You will notice that I also had a label on line 7 where I would populate the contact's identifier so that I could make sure that the tracker is working as expected.

Working with Dynamics CRM

Creating a Proxy Class

When coding for Dynamics CRM, you need to use the "CrmSvcUtil" command-line code generation tool, available in the CRM SDK, in order to generate early-bound classes that represent the entity data model in your CRM system.

So in short; this tool located in the bin folder of the SDK is used to create a proxy class from the CRM Web Service of your instance.

For more information about this, you can check out this link from Microsoft: https://msdn.microsoft.com/en-us/library/gg327844.aspx

I named my generated class file "CrmModels.cs" and threw it into my project.

The xFileManager

I started putting together a manager class that I would use to facilitate finding a user / contact match in Dynamics CRM and then populate the xFile using the contact record's data.

I added a Dynamics "contact" entity property to my class called CrmContact. The plan was to populate this if I had a match in CRM based on email address, and then use it to hydrate my various Sitecore xFile contact facet objects.

Finding the contact in Dynamics CRM

The first method I added to my class was to make a call out to Dynamics to see if I had a contact match based on the identified user's email address. If I did find the user, it would set my CrmContact property to the match and return true.

1:  private bool FoundCrmContact(string emailAddress)  
2: {
3: var connection = new CrmConnection("MTCCRMConnString");
4: var org = new OrganizationService(connection);
5: var crmDataContext = new CRMDataContext(org);
6: var contactMatch = crmDataContext.ContactSet.Where(t => t.EMailAddress1.Equals(emailAddress));
7: if (contactMatch.FirstOrDefault() != null)
8: {
9: CrmContact = contactMatch.FirstOrDefault();
10: return true;
11: }
12: return false;
13: }

Syncing CRM contact data with the identified contact's facets

Next, I focused on writing a method that would populate the contact's various facets with the CRM data if a match was found.

Here is my method:

1:  public void SyncCrmXFile(Sitecore.Analytics.Tracking.Contact identifiedUser)  
2: {
3: if (identifiedUser.Identifiers.IdentificationLevel == ContactIdentificationLevel.Known)
4: {
5: //Get contact unique indentifier, in our case the email address
6: var contactEmail = identifiedUser.Identifiers.Identifier;
7: if (FoundCrmContact(contactEmail))
8: {
9: #region Get Facets
10: var emailFacet = identifiedUser.GetFacet<IContactEmailAddresses>("Emails");
11: var addressFacet = identifiedUser.GetFacet<IContactAddresses>("Addresses");
12: var personalFacet = identifiedUser.GetFacet<IContactPersonalInfo>("Personal");
13: var phoneFacet = identifiedUser.GetFacet<IContactPhoneNumbers>("Phone Numbers");
14: IEmailAddress email = emailFacet.Entries.Contains("Work Email")
15: ? emailFacet.Entries["Work Email"]
16: : emailFacet.Entries.Create("Work Email");
17: IAddress address = addressFacet.Entries.Contains("Work Address")
18: ? addressFacet.Entries["Work Address"]
19: : addressFacet.Entries.Create("Work Address");
20: IPhoneNumber workPhone = phoneFacet.Entries.Contains("Work Phone")
21: ? phoneFacet.Entries["Work Phone"]
22: : phoneFacet.Entries.Create("Work Phone");
23: #endregion
24: #region Update Facets with CRM Contact Data
25: email.SmtpAddress = CrmContact.EMailAddress1;
26: emailFacet.Preferred = "Work Email";
27: address.StreetLine1 = CrmContact.Address1_Line1;
28: address.StreetLine2 = CrmContact.Address1_Line2;
29: address.PostalCode = CrmContact.Address1_PostalCode;
30: personalFacet.Title = CrmContact.Salutation;
31: personalFacet.FirstName = CrmContact.FirstName;
32: personalFacet.MiddleName = CrmContact.MiddleName;
33: personalFacet.Surname = CrmContact.LastName;
34: //personalFacet.Gender = CrmContact.GenderCode.Value;
35: personalFacet.JobTitle = CrmContact.JobTitle;
36: personalFacet.BirthDate = CrmContact.BirthDate;
37: workPhone.CountryCode = workPhone.Number = CrmContact.Telephone1;
38: #endregion
39: Sitecore.Diagnostics.Log.Info(string.Format("Successfully synced Dynamics CRM known user: {0} {1}", CrmContact.FirstName, CrmContact.LastName), this);
40: }
41: }
42: }

In summary, the code above does the following:

  1. Accepts a Sitecore.Analytics.Tracking.Contact object as a parameter
  2. Makes sure that we had already identified the contact
  3. Pulls out the identified contact's email address and looks for a match in CRM
  4. If a match exists in CRM, it uses the data to populate / sync the identified contact's facets
I went ahead and added a call to the method in my IdentifyUser button click event handler just after the line where I identify the contact:

1:  Tracker.Current.Session.Identify(txtCurrentUser.Text);  
2: var xFile = new XFileManager();
3: xFile.SyncCrmXFile(Tracker.Current.Contact);

Identify, Flush and Review

With all these pieces in place, I was ready to do some testing. In my example below, I am using Stefan Edberg as my identified contact.

Side note

If you don't know who Stefan Edberg is, he was an awesome tennis player; one of my idols when growing up. He is currently the tennis coach of Roger Federer.

Here he is as a contact in our Dynamics CRM system:


So, I went ahead and identified Stefan using his email address. Things were starting to look good:


Next, I wanted to flush the session data to Mongo, and review what was populated in our Experience Profile dashboard:


Nice! There he is. Clicking on his name and then the details tab revealed the rest of the data that was populated using the CRM contact data:


Keeping things in sync

What I wanted to do next was make sure that my xFile always contained the most up-to-date data from my CRM system.

The key was finding the sweet spot in the "Session End" pipeline before the actual contact data gets flushed to Mongo.

Looking through some of the analytics config files, and digging a little bit around the analytics assemblies, I found my spot before the Sitecore.Analytics.Pipelines.SessionEnd.InitializeTracker processor.

So, my processor was simply:

1:   public class SyncCrm  
2: {
3: public void Process(PipelineArgs args)
4: {
5: Assert.ArgumentNotNull(args, "args");
6: if (!AnalyticsSettings.Enabled)
7: {
8: return;
9: }
10: RunCrmSync();
11: }
12: private void RunCrmSync()
13: {
14: var xFile = new XFileManager();
15: xFile.SyncCrmXFile(Tracker.Current.Session.Contact);
16: }
17: }

My config file looked like this:

1:  <configuration xmlns:patch="http://www.sitecore.net/xmlconfig/">  
2: <sitecore>
3: <pipelines>
4: <sessionEnd>
5: <processor type="Arke.Sandbox.Xrm.Pipelines.Analytics.SyncCrm, Arke.Sandbox.Xrm" patch:before="processor[@type='Sitecore.Analytics.Pipelines.SessionEnd.InitializeTracker, Sitecore.Analytics']" />
6: </sessionEnd>
7: </pipelines>
8: </sitecore>
9: </configuration>

Mission Complete

With this processor in place, every time the session ends, and before the data gets flushed to Mongo, there would be a call to Dynamics CRM to pull in the latest data associated with the contact so that their Sitecore xFile would always stay up-to-date.

xDB Dataset Growth and Purging

$
0
0
Is there anything we can do about the tremendous growth of our Mongo database?


This question comes up pretty often lately when working with the new versions of Sitecore.

The bad news is that there is currently no purge mechanism in place. This applies to any Sitecore 7.5 or 8.0 Mongo dataset, whether you are using the cloud or an on-premise set up.

A purge tool could potentially make its way into a future Sitecore release, but it isn't something that the product team is actively working on.

Real world example:

We stood up a client's Mongo collection on December 18th with FXM configured on 4 external sites.
As of April 1st, we are at 6.8 gigabytes!

Plan for growth, and lots of it!

Sitecore xDB Cloud Edition: What you need to know

$
0
0
I have been very fortunate to be involved in almost all of the cutting edge Sitecore implementations at Arke, and have had the privilege to work with several awesome members of the Sitecore team.

In one of my recent support projects, I got some great exposure to Sitecore's xDB Cloud offering. I wanted to share what I learnt with the community in hopes of providing a better understanding of what it takes to perform a successful implementation, some pitfalls, and how things change once you are in the cloud.

Getting Started

The "out of the box" components need to be updated in order to use xDB Cloud Edition. The following steps are from the client setup guide. I added some additional information and made some adjustments to make it easier to read.

Updating Cloud xDB Components

Before updating the Cloud xDB components, you need to perform following actions:

If you are using Sitecore 7.5:
  1. Open Website\App_Config\Include\ folder
  2. Remove or disable Sitecore.Cloud.Xdb.config file
If you are using Sitecore 8.0:
  1. Open Website\App_Config\Include\XdbCloud folder
  2. Remove or disable the following files:
  • Sitecore.Cloud.Xdb.config
  • Sitecore.ContentSearch.Cloud.Index.Analytics.config
  • Sitecore.ContentSearch.Cloud.DefaultIndexConfiguration.config
  • Sitecore.ContentSearch.Cloud.config
      The following 2 packages, supplied by Sitecore's Cloud Team, need to be installed in your Sitecore instance:
      1. Sitecore.Cloud.ContentSearch
      2. Sitecore.Cloud.Xdb

      Configuring the Sitecore Cloud xDB client

      1. Open the folder of your Sitecore installation, and navigate to Website\App_Config\Include\XdbCloud
      2. Open the Sitecore.Cloud.Xdb.config.disabled file and change the setting Sitecore.Cloud.Xdb.DeploymentId to the value that should identify your deployment. An example would be "Corp-V8X-Prod".
      • You must specify a value for this setting before you run Sitecore for the first time after you configure Sitecore to use a cloud xDB.
    • Make sure that the your Sitecore.Cloud.Xdb.DeploymentType setting reflects the environment that you are configuring. Options are "Prod" and "NonProd".
    • It is important to note:
      • Sitecore will not boot if this setting doesn't match what is retrieved from the xdb service.
      • Running a production solution on a non-prod SLA will degrade your overall SLA.
      • Running a non-production solution on a production data set will pollute the production data set.
    • Enable the following config files (enable means remove .disabled extension from the name): 
      • Sitecore.Cloud.Xdb.config.disabled
      • Sitecore.ContentSearch.Cloud.Index.Analytics.config.disabled
      • Sitecore.ContentSearch.Cloud.DefaultIndexConfiguration.config.disabled

      Upgrading from xDB Cloud Edition 7.5 to 8.0

      1. If you have been running Sitecore Cloud xDB 7.5, there is an upgrade process that needs to take place to make your dataset work with Sitecore 8.0.
      2. The reason for this is because there is an additional collection that is now present in 8.0
      3. At the time of writing this post, Sitecore was still working on finalizing the script to upgrade the 7.5 dataset to work with 8.0.

      Provisioning a new xDB Cloud Dataset

      1. If you need to provision a new xDB set, you can do so by simply by changing the value present in Sitecore.Cloud.Xdb.DeploymentId that you will find in the Sitecore.Cloud.Xdb.config file.
      2. You have a quota limit tied to your licensing, so if you see a "Quota limit has been reached" error in your logs, you will need to contact your Sitecore sales rep.
      3. A common scenerio would involve setting up 2 datasets; one for staging and one for production.

      Licensing

      xDB Cloud Edition is tied to the your license ID. If you have recently made a change to your licensing, or if you are a new Sitecore customer, you will need to wait until you have received your permanent license in order to provision your cloud dataset.

      Connection Strings

      1. The various Mongo connection strings that you find in your ConnectionStrings.config file are not needed after you have successfully connected to your xDB Cloud Dataset.
      2. When using the cloud, the connection strings are still actually there even though they don't appear in the configuration file. They are created dynamically InProc by the cloud discovery service. 
      3. The same applies to the reporting and reporting.secondary connection strings. However you need to have those in place in order to avoid the various errors that occur when trying to rebuild the reporting database. To be clear, this doesn’t really matter anyway because there currently isn't a way to make this work when using xDB Cloud Edition.

      Losing the xDB Cloud connection

      1. If you lose the connection you don’t lose data
      2. The data is stored on the file system and then pushed to the cloud once the connection is re-established
      3. The data is stored in the $(dataFolder)/Submit Queue folder

      xDB Cloud Dataset Access

      One of the nice things about using xDB Cloud Edition, is that once your licensing is in place, getting up and running is very easy. All that you need to do is load 2 packages in your Sitecore instance, change 2 values in a configuration file, and enable the configuration. You also don't have to worry about some of the complex sharding and backup issues that will arise when dealing with an enterprise Mongo configuration.

      The downside is that you don't have direct access to the various collections. So, you can't connect using a tool like Robomongo or MongoVUE. You also don’t have the ability to stand up new collections, if say you wanted to write some log entries or put some interesting CRM data in a new collection.

        xDB Cloud Edition Reporting Databases

        1. It's important to note that the reporting SQL databases are hosted in the cloud. This includes both the primary and secondary.
        2. There is currently no way to successfully rebuild the reporting databases from the /sitecore/admin/rebuildreportingdb.aspx page.

        Common Errors

        Error

        The connection string used by aggregation/historyTaskManager/ReportingStorage is missing when you attempt to rebuild reporting database from /sitecore/admin/rebuildreportingdb.aspx page

        Resolution

        The reporting.secondary connection string is not present. Although this secondary reporting database 
        is not used by cloud xDB, it is necessary in order to get passed this error. 

        Error

        Analytics SPEAK pages show a series of errors

        Resolution

        All errors that I have seen in the various analytics pages are related to a xDB connection issue.
        So if you are seeing some of the red error messages like this, make sure you check your logs for xDB connection errors.

        Error

        xDB Cloud Initialization failed

        Sample:
         ERROR xDB Cloud - xDB Cloud initialization failed. Please contact cloud@sitecore.net and include this in the email:  
        **********************************************************************************
        License Id: xxxxxxxxxxxxxxxxxxxx
        Deployment Id: XXX-ProdV8-xDB
        Issue id: 8bab88fa6e9c497b8d717eb62c39252c
        Discovery Service Status Code: 403 Forbidden
        Exception Details: Sitecore.Cloud.Xdb.Exceptions.RequestForbiddenException: Quota limit has been reached, or subscription wasn't found
        at Sitecore.Cloud.Xdb.DiscoveryServiceClient.AssertStatusCodes(IRestResponse restResponse, String licenseId, String deploymentId)
        at Sitecore.Cloud.Xdb.DiscoveryServiceClient.GetXdbSet(String licenseId, String deploymentId, String sitecoreVersion, DeploymentType deploymentType)
        at Sitecore.Cloud.Xdb.DiscoveryServiceClient.GetXdbSet()
        at Sitecore.Cloud.Xdb.UpdateXdbConnectionStrings.Process(PipelineArgs args)
        **********************************************************************************

        Resolution

        1. As the message indicates, you will need to contact Sitecore's cloud team at cloud@sitecore.net to get these connection errors resolved. 
        2. The Issue id is key for them in identifying the cause of the error.
        3. The team is extremely helpful and their turnaround to get your issues resolved is pretty quick.

        Managing Countries and Regions within the same site (Part 1) : Getting Started

        $
        0
        0

        Background

        In one of the projects that I am working on, we are re-platforming a United States and Canada website from Drupal to Sitecore. During the early phases of the project, there was a lot of talk about a "lift-and-shift". As you know, that's never the case. The sites ended up being completely re-done, and the E-Commerce functionality re-worked.

        Technologies and integrations include:

        1. Sitecore XP 8 Update-2
        2. Sitecore Commerce Connect 8.0
        3. Adobe Scene7 (custom connector on the Media Framework)
        4. RightNow CRM (custom connector)
        5. Shopatron E-Commerce checkout and inventory lookup.


          The Use Case and The Kicker

          As I mentioned before, we are re-platforming 2 independent Drupal sites for different countries. The sites are almost identical. Out of the gate, every page on the US site would exist on the Canada site. The only things that would be different would be products (some would appear on the US site and not on Canada),  pricing, and some Shopatron specific API information that we had to pass to Shopatron when a user was ready to complete the checkout process.

          Easy enough. We could do all this within a single site with a bit of logic right?

          The kicker was that down the road, content authors wanted the ability to add pages and pieces of content that were country-specific. For example, if there was a specific product promotion, they wanted to be able to add their own landing pages, and wanted the ability to display new call to actions (CTAs) on the home and other pages of their site.We couldn't have US pages and CTAs show up on Canada's site and vice versa.

          Would we have to build out the US site and then copy it over to create the Canada site?

          The Solution

          Andy Uzick was in town during the architectural debate, and so we went out to lunch and started throwing out some ideas between his dirty jokes.

          This is what we decided:

          1. Stick with a single site for the North America Region.
          2. Create regional settings that we could link to the site's context and items within the site.
          3. Create a "region resolver" pipeline processor within the HttpRequestBegin pipeline that would take a look at the context of the site that was running to determine the region, and then decide if the page or other content should be displayed or not.
          4. Build a custom condition for the Sitecore Rules Engine that content authors could utilize to display regional specific content for pages that existed on both sites.
          5.  

          Creating the Region Settings

          The first template we created was the Region template. This would be used to house or site specific regional data:


          Next, we created the region content items based on the Region template in our global / shared location in the content tree, so that data could be consumed by our specific data templates:


          We then created a base Site Region template with a multilist field that we configured to pull in the regions that we had set up in the global / shared location:


          We made sure that the standard values had both regions selected:


          We then set the necessary templates that needed regional specific settings such as pages and products, to inherit from the Site Region base template:


          Finally, this is what one of the Page items looked like that had the regional settings in place:


          At this point, we had everything ready content-wise to start coding against.

          Looking Forward

          Next up will be Part 2, The Region Resolver -  I will walk through how we built out the region resolver pipeline processor within the HttpBeginRequest pipeline

          Part 3,  The Region Custom Condition - I will demonstrate building out the custom condition for the Sitecore Rules Engine.

          Part 4, Regions in Action - I will put everything together, and show it in action.


          Schedule Full and Incremental Content Backups using PowerShell Extensions

          $
          0
          0
          During my studies in University, and working for a smaller company in the past where I was involved in the hardware side of the IT world,  I discovered the power of command-line scripts when automating daily tasks such as server backups.

          Looking back at late 2006, when Microsoft first introduced PowerShell,  they gave us a more advanced command-line interface where we could do some really fancy stuff. There was a new syntax we had to learn, but with enough time, it was as familiar as the good old MS-DOS prompt.


          Enter Sitecore PowerShell Extensions

          Having been in the Sitecore world for quite some time, I was excited to find Sitecore PowerShell Extensions on the marketplace.

          As Alistair Deneys put it at the 2012 Symposium:
          "There is nothing you can not do with PowerShell Console, because you're inside the Sitecore application. You can call the Sitecore API"

          I have been using the module religiously for the past year, and am truly impressed by the work of the contributors.

          If you know a little PowerShell, and haven't tried it before, I suggest you download and give it a bash.

          This post assumes that you have the module installed. As I am running XP 8.0 Update 2, I installed version 3.0 in my instance.

          The Use Case

          As I mentioned in an earlier post, one of the projects that I am working on involves building out a couple new sites that have an E-Commerce back end that supports thousands of products that we are integrating into Sitecore via Commerce Connect.

          One of the features that the client requested was the ability to perform batch product updates using Microsoft Excel. We ended up building an admin app where they could export and import CSV files and manipulate the content within Sitecore, using the data within these files. Our tree structure looks like this:

          You may already be thinking that this sounds like trouble, and trust me, we had the same thoughts.

          Wouldn't it be nice if we could have an automated daily backup strategy that would enable us to revert to a backup set relatively quickly in case something went wrong? Just like a server backup script?

          PowerShell Backup Scripts

          After doing some research and testing, I formulated the following scripts that create either a full or incremental package of all the items in the Master database that are located at this path in the content tree: "/sitecore/content/Data/Product-Repository/Products". You can modify this path to suite your needs.

          Full Backup Script

           $packageBackupName = "Client Products Full Package Backup";  
          $sourceItems = Get-ChildItem -Path "master:\sitecore\content\Data\Product-Repository\Products"
          $package = new-package $packageBackupName;
          $package.Sources.Clear();
          Write-Log "$packageBackupName started";
          $Author = [Sitecore.Context]::User.Profile.FullName;
          $Publisher = [Sitecore.SecurityModel.License.License]::Licensee
          $DayOfWeek = [datetime]::Now.DayofWeek
          $package.Metadata.Author = $Author;
          $package.Metadata.Publisher = $Publisher;
          $package.Metadata.Version = "";
          $package.Metadata.Readme = "";
          $packageSource = $sourceItems | New-ItemSource -Name "Content Source" -InstallMode Overwrite -MergeMode Merge
          $package.Sources.Add($packageSource);
          Export-Package -Project $package -Path "$packageBackupName-$DayOfWeek" -Zip
          Write-Log "$packageBackupName completed"

          Incremental Backup Script

          Note: This script will generate a package of items located under the target path that have been added or changed within the last 2 days. You can modify this day value by changing the "$changedDays" variable below.

           $packageBackupName = "Client Products Incremental Package Backup";  
          $changedDays = 2;
          $sourceItems = Get-ChildItem -Recurse -Path "master:\sitecore\content\Data\Product-Repository\Products" | Where-Object { $_."__Updated" -gt (Get-Date).AddDays(-$changedDays) -or $_."__Created" -gt (Get-Date).AddDays(-$changedDays)}
          $package = new-package $packageBackupName;
          $package.Sources.Clear();
          Write-Log "$packageBackupName started";
          $Author = [Sitecore.Context]::User.Profile.FullName;
          $Publisher = [Sitecore.SecurityModel.License.License]::Licensee
          $DayOfWeek = [datetime]::Now.DayofWeek
          $package.Metadata.Author = $Author;
          $package.Metadata.Publisher = $Publisher;
          $package.Metadata.Version = "";
          $package.Metadata.Readme = "";
          $packageSource = $sourceItems | New-ItemSource -Name "Content Source" -InstallMode Overwrite -MergeMode Merge
          $package.Sources.Add($packageSource);
          Export-Package -Project $package -Path "$packageBackupName-$DayOfWeek" -Zip
          Write-Log "$packageBackupName completed"

          Running Scripts and Package Default Location


          Setting up Scheduled Tasks

          You can certainly run these scripts on demand to create packages, but the real magic would be to let these scripts run on a schedule so that once they are set up, they would take care of themselves.

          This can be achieved within a few simple steps:

          1. Navigate to /sitecore/system/Modules/PowerShell/Script Library/Task Management/Tasks and create a new Powershell Script Library item, that will contain your 2 scripts. I called mine "Content Backups".

          2. Within this new script library item, create 2 new PowerShell Script items, and paste in each respective PowerShell script. I called my items "Full Product Backup" and "Incremental Product Backup".


          3. Navigate to "/sitecore/system/Tasks/Schedules" and create a Schedule Item to invoke the scripts housed in the Items above. To learn more about Sitecore Scheduled Tasks, please see John West‘s post discussing them).

            3.1 Set the command to "Commands/PowerShellScriptCommands"
            3.2 Set items to the location of your PowerShell Script Item for each script that you created in step
          2.
            3.3 Set the schedule item to your preferred value.


          I set my Full Backup to ||1|13.00:00 so that it will run once on Sunday and the interval will be 13 hours, so it will only be executed once within the day.

          I set my Incremental Backup to ||126|13.00:00 so that it will run Monday - Saturday, once during the day (same as above).

          Reviewing and Testing your Scheduled Tasks

          Checking that you set up everything correctly and testing it out is easy. Simply open up the Task Manager within the PowerShell Toolbox:


          Once launched, you can review the scheduled tasks that you set up. To test either of them, click on the item and then click the "Execute Now" button.


          How to Reset All Values for a Field using PowerShell

          $
          0
          0
          Today I ran into a situation where we had a Multilist with Search field for a bunch of items that had values set to items that no longer existed in our instance. This is often the case when you are in development and deleting and adding sections of the tree while testing things.

          As you know, Sitecore tends to be unhappy when this happens. A common error message is the following:

          Guid should contain 32 digits with 4 dashes (xxxxxxxx-xxxx-xxxx-xxxx-xxxxxxxxxxxx).

          So, I thought it would be a good exercise to write up a quick PowerShell script that would iterate over items in my tree, and reset the values for a field that I specify.

          All you need to do is set the $fieldToReset and $path variable values to suit your needs.

          $fieldToReset = "My Field Name";  
          $path = "master:\sitecore\content\MyItem";
          $items = Get-ChildItem -Path $path -Recurse
          $items | ForEach-Object { if ($_.fieldToReset -ne $null) {$_.fieldToReset = ""} }

          Bless you PowerShell!


          Managing Countries and Regions within the same site (Part 2) : The Region Resolver

          $
          0
          0
          With the content in place, the next step was to be able to tie the specific site instances to their respective countries or regions. We wanted to keep things nice and clean, and decided to add 2 additional attributes to the site definitions within our config file:

          1. siteRegion - The item id value of the region content item
            1. 1 These items where located in the global / shared location within our site. See part 1 for more information.

          2. pageNotFound - Redirect the user to a path within our site that contains a "page not found" page if they try and access a page that didn't match their country or region. 
              So, our site definition looked something like this:

              <sites>  
              <site name="MySiteUSA" patch:before="site[@name='website']"
              virtualFolder="/"
              physicalFolder="/"
              rootPath="/sitecore/content"
              startItem="/MySite"
              database="master"
              domain="extranet"
              allowDebug="true"
              cacheHtml="true"
              htmlCacheSize="10MB"
              enablePreview="true"
              enableWebEdit="true"
              enableDebugger="true"
              disableClientData="false"
              hostName="*MySiteusa.com"
              siteRegion="{B4F05B9C-1A40-4B95-AC03-C2115E7CA448}"
              pageNotFound="/Page-Not-Found"

              />
              <site name="MySiteCA" patch:before="site[@name='website']"
              virtualFolder="/"
              physicalFolder="/"
              rootPath="/sitecore/content"
              startItem="/MySite"
              database="master"
              domain="extranet"
              allowDebug="true"
              cacheHtml="true"
              htmlCacheSize="10MB"
              enablePreview="true"
              enableWebEdit="true"
              enableDebugger="true"
              disableClientData="false"
              hostName="*MySitecda.com"
              siteRegion="{A71B1C90-107B-4740-9913-8E683B019BF7}"
              pageNotFound="/Page-Not-Found"

              />
              </sites>

              Quick note:
              This site definition is not meant for a production instance. You obviously want to increase the cache size and turn off things like debugging in production.

              Next, we added a simple class that we would use to retrieve an object that contains our site's context as well as the above-mentioned attributes from the configuration xml via it's properties.

              When looking at the code below (starting at line 44), you will notice that we are attempting to pull the region object out of cache if it exists. We added a caching layer, because we wanted to ensure that this processor would be as fast as possible. You will see this being used a lot in our processor code that follows.

              1:  public class SiteRegion  
              2: {
              3: private const string SiteNode = "/sitecore/sites";
              4: private XmlNode CurrentSiteNode
              5: {
              6: get
              7: {
              8: XmlNode targetParamsNode = Factory.GetConfigNode(SiteNode);
              9: var currentSiteContext = Context.Site;
              10: foreach (XmlNode childNode in targetParamsNode.ChildNodes)
              11: {
              12: if (XmlUtil.GetAttribute("name", childNode)
              13: .Equals(currentSiteContext.Name, StringComparison.InvariantCultureIgnoreCase))
              14: {
              15: return childNode;
              16: }
              17: }
              18: return null;
              19: }
              20: }
              21: public string CacheKey
              22: {
              23: get
              24: {
              25: return Context.Site.Name;
              26: }
              27: }
              28: public SiteContext Site
              29: {
              30: get { return Context.Site; }
              31: }
              32: public string Region
              33: {
              34: get { return XmlUtil.GetAttribute("siteRegion", CurrentSiteNode); }
              35: }
              36: public string PageNotFoundUrl
              37: {
              38: get { return XmlUtil.GetAttribute("pageNotFound", CurrentSiteNode); }
              39: }
              40: public static string CurrentRegion
              41: {
              42: get
              43: {
              44: var siteRegion = CacheHelper.RegionCache.GetObject(Context.Site.Name) as SiteRegion;
              45: if (siteRegion == null)
              46: {
              47: siteRegion = new SiteRegion();
              48: CacheHelper.RegionCache.SetObject(Context.Site.Name, siteRegion);
              49: }
              50: return siteRegion.Region;
              51: }
              52: }
              53: }

              Region Resolver Processor

              Next, we built out the region resolver pipeline processor to check if an item was meant for a specific country / region.

              Sitecore provides us with a nice SafeDictionary KeyValuePair object in their PipelineArgs that is useful for adding custom data to pass down the pipeline. This was ideal for us to pass the message along to the Region Page Not Found processor (next up) telling it whether the "page not found" page should be displayed or not (Line 26).

              Line's 15 and 16 are performing the check for the context item's region field being set.

              1:  public class RegionResolver : HttpRequestProcessor  
              2: {
              3: public override void Process(HttpRequestArgs args)
              4: {
              5: Assert.ArgumentNotNull(args, "args");
              6: var showRegionPage = true;
              7: var siteRegion = CacheHelper.RegionCache.GetObject(Context.Site.Name) as SiteRegion;
              8: if (siteRegion == null)
              9: {
              10: siteRegion = new SiteRegion();
              11: CacheHelper.RegionCache.SetObject(Context.Site.Name, siteRegion);
              12: }
              13: if (Context.Item != null && siteRegion.Site.HostName.IsNotEmpty())
              14: {
              15: if (Context.Item.Fields["Region"] != null &&
              16: !Context.Item.Fields["Region"].Value.Contains(siteRegion.Region))
              17: {
              18: showRegionPage = false;
              19: }
              20: }
              21: if (showRegionPage)
              22: {
              23: return;
              24: }
              25: //Add entry to safe dectionary to tell region page not found processor to redirect to page not found
              26: args.CustomData.Add("hideRegionPage", true);
              27: var notFoundProcessor = new RegionPageNotFound();
              28: notFoundProcessor.Process(args);
              29: }
              30: }

              Region Page Not Found Processor

              One of things that we wanted was to have a "page not found" bit of logic that would be able to handle both our normal page not found / 404's for our sites, as well as those that were not supposed to be displayed for our country / region.

              So, we wrote a processor that would be able to catch both.

              Before looking at the code, there are a few things to note:
                1. On line 7, we are checking to see if our Region Resolver has told us to hide the context item via the "message" in the safe dictionary object .
                2. If you have defined custom MVC routes, you would need to check for those in the pipeline and allow them to be processed (line 31).
                3. This processor would do the job of redirecting visitors to our page not found path, set in our site definition that was mentioned above (line 47).

                  1:  public class RegionPageNotFound : HttpRequestProcessor  
                  2: {
                  3: public override void Process(HttpRequestArgs args)
                  4: {
                  5: Assert.ArgumentNotNull(args, "args");
                  6: //Check for safe dectionary object indicating that page needs to be "hidden"
                  7: var hideRegionPage = args.CustomData.ContainsKey("hideRegionPage");
                  8: if (!hideRegionPage &&
                  9: (Context.Item != null
                  10: || Context.Site == null
                  11: || Context.Site.Name.Equals("shell", StringComparison.CurrentCultureIgnoreCase)
                  12: || Context.Site.Name.Equals("website", StringComparison.CurrentCultureIgnoreCase)
                  13: || Context.Database == null
                  14: || Context.Database.Name.Equals("core", StringComparison.CurrentCultureIgnoreCase)
                  15: || string.IsNullOrEmpty(Context.Site.VirtualFolder)
                  16: ))
                  17: {
                  18: return;
                  19: }
                  20: // The path in the requested URL.
                  21: var filePath = Context.Request.FilePath.ToLower();
                  22: if (string.IsNullOrEmpty(filePath)
                  23: || WebUtil.IsExternalUrl(filePath)
                  24: || System.IO.File.Exists(HttpContext.Current.Server.MapPath(filePath)))
                  25: {
                  26: return;
                  27: }
                  28: //Api path checks
                  29: var uri = HttpContext.Current.Request.Url.AbsoluteUri;
                  30: if (uri.Contains("sitecore/api")
                  31: || uri.Contains("api/mycustomroute"))
                  32: {
                  33: return;
                  34: }
                  35: var siteRegion = CacheHelper.RegionCache.GetObject(Context.Site.Name) as SiteRegion;
                  36: if (siteRegion == null)
                  37: {
                  38: siteRegion = new SiteRegion();
                  39: CacheHelper.RegionCache.SetObject(Context.Site.Name, siteRegion);
                  40: }
                  41: // Send the NotFound page content to the client with a 404 status code
                  42: if (!string.IsNullOrEmpty(siteRegion.Region) && !string.IsNullOrEmpty(siteRegion.PageNotFoundUrl))
                  43: {
                  44: var ctx = HttpContext.Current;
                  45: ctx.Response.TrySkipIisCustomErrors = true;
                  46: ctx.Response.StatusCode = 404;
                  47: ctx.Response.Redirect(siteRegion.PageNotFoundUrl);
                  48: ctx.ApplicationInstance.CompleteRequest();
                  49: }
                  50: }
                  51: }

                  Hooking into the HttpBeginRequest Pipeline

                  The final piece of this puzzle, was to add our new processors to the HttpBeginRequest Pipeline, after the ItemResolver processor.

                  Here is what the config file looked like that would make the magic happen:

                  <pipelines>  
                  <httpRequestBegin>
                  <processor
                  type="MyProject.Library.Pipelines.HttpRequestBegin.RegionResolver, MyProject.Library"
                  patch:after="processor[@type='Sitecore.Pipelines.HttpRequest.ItemResolver, Sitecore.Kernel']"/>
                  <processor
                  type="MyProject.Library.Pipelines.HttpRequestBegin.RegionPageNotFound,
                  MyProject.Library"
                  patch:after="processor[@type='Sitecore.Pipelines.HttpRequest.ItemResolver, Sitecore.Kernel']"/>
                  </httpRequestBegin>
                  </pipelines>

                  Order is important here, because as I mentioned, we want the Region Resolver Processor to be able to tell the Region Not Found Processor whether or not the page should be displayed for the context site.

                  Next Up

                  In Part 3, I am going to demonstrate how we were able to "regionize" renderings on the sites by building a custom condition for the Sitecore Rules Engine.
                   

                  FXM Experience Editor - Cleaning Up Problematic External Content

                  $
                  0
                  0

                  Background

                  I have been using Federated Experience Manager (FXM) a lot, and it has worked extremely well in almost all of our client deployments.


                  I recently ran into an issue with one of our client's production instance where we had an external site that wasn't able to load up in the FXM Experience Editor.  We could see the page start loading, and then after a few seconds, it would stop leaving a blank page with a little bit of script. This left us scratching our heads for quite some time.

                  Using Fiddler's AutoResponder feature, we were eventually able to determine
                  that if we disabled an Adobe Dynamic Tag Management script library, we were able to successfully load the external site in the Experience Editor.

                  Our problematic script:


                  Our client made it very clear that removing the script from the external site was not an option. So, we needed to find a way to remove the script from the external site when loading it in the Experience Editor only.

                  Finding the Sweet Spot

                  Almost certain that there had to be a pipeline that I could hook into, I armed myself with the instance's "showconfig" and my favorite decompiler (JetBrains dotPeak), I started digging around until I discovered the following pipeline:

                  1:  <content.experienceeditor>  
                  2: <processor type="Sitecore.FXM.Client.Pipelines.ExperienceEditor.ExternalPage.GetExternalPageContentProcessor, Sitecore.FXM.Client"/>
                  3: <processor type="Sitecore.FXM.Client.Pipelines.ExperienceEditor.ExternalPage.UpdateBeaconScriptPathProcessor, Sitecore.FXM.Client"/>
                  4: <processor type="Sitecore.FXM.Client.Pipelines.ExperienceEditor.ExternalPage.InjectControlsProcessor, Sitecore.FXM.Client"/>
                  5: <processor type="Sitecore.FXM.Client.Pipelines.ExperienceEditor.ExternalPage.AddPlaceholderData, Sitecore.FXM.Client"/>
                  6: </content.experienceeditor>
                  This looked very promising indeed! Next step was to crack open the GetExternalPageContentProcessor.

                  Voila, I found exactly what I was looking for; the point at which FXM grabs the content from the external site, and sticks it into an argument that the rest of the processors can access (lines 19 & 20):

                  1:  public void Process(ExternalPageExperienceEditorArgs args)  
                  2: {
                  3: Assert.ArgumentNotNull((object) args, "args");
                  4: Assert.ArgumentNotNull((object) args.MatcherContextItem, "MatcherContextItem");
                  5: Assert.ArgumentNotNull((object) args.ExperienceEditorUrl, "ExperienceEditorUrl");
                  6: string externalPageUrl = this.GetExternalPageUrl(args);
                  7: if (string.IsNullOrEmpty(externalPageUrl))
                  8: {
                  9: args.AbortPipeline();
                  10: }
                  11: else
                  12: {
                  13: string experienceEditorUrl = this.GetBaseExperienceEditorUrl(args);
                  14: HttpRequestMessage request = new HttpRequestMessage(HttpMethod.Get, externalPageUrl);
                  15: request.Headers.Add("FxmReferrer", (IEnumerable<string>) new string[1]
                  16: {
                  17: experienceEditorUrl
                  18: });
                  19: HttpResponseMessage httpResponseMessage = this.externalSiteWebProxy.MakeRequest(string.Format("{0}&url={{0}}", (object) experienceEditorUrl), request);
                  20: args.ExternalPageContent = httpResponseMessage.Content.ReadAsStringAsync().Result;
                  21: }
                  22: }

                  FXM External Content Sanitizer Processor

                  Yes, the name is a mouthful!

                  Knowing that this type of problem was bound to pop up again, I decided to write a custom processor that would accept a series of regular expressions in configuration,  and use them to strip out any problematic content that may be causing issues when loading up the FXM Experience Editor.

                  Processor

                  1:  public class SanitizeContent : IExternalPageExperienceEditorProcessor  
                  2: {
                  3: private static string _sanitizeNode = "/sitecore/fxmSanitizeExternalContent";
                  4: public void Process(ExternalPageExperienceEditorArgs args)
                  5: {
                  6: Assert.ArgumentNotNull(args, "args");
                  7: Assert.ArgumentNotNull(args.ExternalPageContent, "ExternalPageContent");
                  8: foreach (var regex in GetRegexList())
                  9: {
                  10: var currentReg = new Regex(regex);
                  11: var cleanHtml = currentReg.Replace(args.ExternalPageContent, "");
                  12: args.ExternalPageContent = cleanHtml;
                  13: }
                  14: }
                  15: /// <summary>
                  16: /// Returns list of strings containing regular expressions that have been set in configuration
                  17: /// </summary>
                  18: private static IEnumerable<string> GetRegexList()
                  19: {
                  20: var configNode = Factory.GetConfigNode(_sanitizeNode);
                  21: var regexList = new List<string>();
                  22: foreach (XmlNode childNode in configNode.ChildNodes)
                  23: {
                  24: regexList.Add(XmlUtil.GetAttribute("value", childNode));
                  25: }
                  26: return regexList;
                  27: }
                  28: }

                  Configuration

                  You can duplicate line 4 and add as many regular expressions as you need to. In my configuration, I added a regular expression (thanks Andy Uzick for the help) to strip out any script that contained the words "adobetm".

                  1:  <configuration xmlns:patch="http://www.sitecore.net/xmlconfig/">  
                  2: <sitecore>
                  3: <fxmSanitizeExternalContent>
                  4: <sanitizeRegex value="&lt;script[^&lt;]*(adobedtm)[\s\S]*?&lt;/script&gt;"/>
                  5: </fxmSanitizeExternalContent>
                  6: <pipelines>
                  7: <group groupName="FXM" name="FXM">
                  8: <pipelines>
                  9: <content.experienceeditor>
                  10: <processor type="MyProject.Domain.Pipelines.ExperienceEditor.ExternalPage.SanitizeContent, MyProject.Domain" patch:after="processor[@type='Sitecore.FXM.Client.Pipelines.ExperienceEditor.ExternalPage.GetExternalPageContentProcessor, Sitecore.FXM.Client']" />
                  11: </content.experienceeditor>
                  12: </pipelines>
                  13: </group>
                  14: </pipelines>
                  15: </sitecore>
                  16: </configuration>

                  Problem solved!

                  With the script removed, the external site loaded up in the FXM Experience Editor, and we were able to complete the tasks that we had originally set out to do.

                  I hope that this helps others that run into this same issue.


                  Mastering Sitecore MVC Forms : CRUD that works on both Management and Delivery servers

                  $
                  0
                  0

                  The Use Case

                  This is a very common scenario; you need to build a form that has the ability to create or update items in Sitecore after a user has input data and clicked the submit button.

                  This sounds pretty straightforward right? Well, it gets a bit tricky when you don't have direct access to the master database. For example, if you are trying to perform CRUD operations on a security hardened content delivery server, you don't have access to the master database, and this will fail.

                  Most folks will create a new web service on their management server that they could consume to handle this. A good option, but something extra to build and maintain.

                  In this post, I am going to show you how to make your form logic "smart" enough to be able to create or update items even when they are posting from content delivery servers.

                  The Form

                  Let's start out by looking at a simple form where we ask a user to input some basic information so that they can receive a reminder about an event. We intend to use this data to create an item in the master database so that a scheduled task running in the management instance will determine when to email them to remind them about the event.


                  The Model

                  The model is pretty simple. As you can tell, the class' properties almost match the form's input.

                  1:  public class ReminderViewModel : ModelBase<Item>  
                  2: {
                  3: public ReminderStrings FormStringsAndLinks { get; set; }
                  4: public Event RemindEvent { get; set; }
                  5: public string EventId { get; set; }
                  6: public string FirstName { get; set; }
                  7: public string LastName { get; set; }
                  8: public string Email { get; set; }
                  9: public bool Consent { get; set; }
                  10: }

                  FormsStringsAndLinks and ReminderEvent are complex properties used to display some form input strings, links and the event information as shown above.

                  The Client Script

                  We are using AJAX to post our form. The following JavaScript snippet is an AngularJS / jQuery mix where there is a validation check on the form after the user clicks the schedule reminder button. If it's valid, we build a view model object, and post it to the SubmitReminder action in my Forms controller.

                  1:  if (isValid) {  
                  2: var reminderViewModel = {};
                  3: reminderViewModel.firstname = $scope.txtreminderfirstname;
                  4: reminderViewModel.lastname = $scope.txtreminderlastname;
                  5: reminderViewModel.email = $scope.txtreminderemail;
                  6: reminderViewModel.eventId = jQuery("#hdnEventId").val();//Angular doesn't like hidden fields with guids
                  7: reminderViewModel.consent = $scope.chkreminderconsent ? $scope.chkreminderconsent : false;
                  8: $http.post("/api/mysite/forms/SubmitReminder", reminderViewModel )
                  9: .success(function () {
                  10: jQuery("#reminder-app").slideUp("slow");
                  11: jQuery("#reminder-set").removeAttr("style");
                  12: })
                  13: .error(function () {
                  14: alert("An error occurred while adding you to our reminder list.");
                  15: });
                  16: }

                  The Submit Reminder Action

                  The action method takes the model object, and then passes it to a business layer method in line 5. If it is successful, it will use some key values to identify the contact in xDB. The xDB piece is beyond the scope of this post.

                  1:  [HttpPost]  
                  2: public bool SubmitReminder(ReminderViewModel reminderViewModel)
                  3: {
                  4: var reminderManager = new ReminderManager();
                  5: var success = reminderManager.CreateEventReminder(reminderViewModel);
                  6: if (success)
                  7: {
                  8: var identifiedContact = new IdentifyContact
                  9: {
                  10: FirstName = reminderViewModel.FirstName,
                  11: LastName = reminderViewModel.LastName,
                  12: Email = reminderViewModel.Email
                  13: };
                  14: ExperienceProfile.ContactIdentifier = reminderViewModel.Email;
                  15: ExperienceProfile.UpdateProfile(identifiedContact);
                  16: }
                  17: return success;
                  18: }

                  Nothing special happening in the business layer method. It is strictly a wrapper around the repository in this case.

                  1:  public bool CreateEventReminder(ReminderViewModel reminderViewModel)  
                  2: {
                  3: return _eventRepository.CreateEventReminder(reminderViewModel);
                  4: }

                  Handling the CRUD

                  Config Settings

                  In our set up, we have an element where we define the application instance type, default database and the url for the management instance.

                  We also have other config nodes that help to dynamically switch the Solr or Lucene indexes that we are querying against based on the environment we have set. We won't get too much into this, but it's basically a static configuration class that we access within our query methods.

                  1:  <mysite.com  
                  2: applicationInstance="management"
                  3: defaultDomain="mysite.com"
                  4: defaultDatabase="master"
                  5: siteName=""
                  6: managementInstanceUrl="http://cm.mysite.com">
                  7: <indexes>
                  8: <index name="buckets" management="sitecore_master_index" delivery="sitecore_web_index" />
                  9: <index name="products" management="commerce_products_master_index" delivery="commerce_products_web_index" />
                  10: <index name="media" management="scene7_media_master_index" delivery="scene7_media_web_index" />
                  11: </indexes>
                  12: </mysite.com>

                  On a delivery server, the applicationInstance would be set to "delivery" and the defaultDatabase to "web".

                  Create Event Reminder

                  The first method that gets accessed in our repository is CreateEventReminder, as shown above in the quick snippet from the business code.

                  1:  public bool CreateEventReminder(ReminderViewModel reminderViewModel)  
                  2: {
                  3: return Settings.ApplicationInstance == InstanceType.Management ? CreateEventReminderMaster(reminderViewModel) : PostEventToManagement(reminderViewModel);
                  4: }

                  Line 3 is a ternary that determines if we are on the delivery or management instance, and either passes the model object to the CreateEventReminderMaster method if we are on the management server, or to the PostEventToManagement method if we are on the delivery server.

                  Creating the Item in the Master Database

                  The CreateEventReminderMaster method below, as it's name indicates, creates items in the master database. There is a check to determine if the item already exists in the database, before creating it. Nothing really fancy here.


                  1:  public bool CreateEventReminderMaster(ReminderViewModel reminderViewModel)  
                  2: {
                  3: //We are on the management server
                  4: var masterService = new SitecoreService("master");
                  5: var destinationFolder = masterService.Database.GetItem(new ID(Sitecore.Configuration.Settings.GetSetting("EventReminderFolderID")));
                  6: if (destinationFolder == null)
                  7: {
                  8: return false;
                  9: }
                  10: var itemName = ItemUtil.ProposeValidItemName(reminderViewModel.Email + reminderViewModel.EventId);
                  11: if (!EventReminderExists((itemName)))
                  12: {
                  13: if (!EventReminderExistsFallback((itemName)))
                  14: {
                  15: var newUser = new Event_Reminder
                  16: {
                  17: Name = itemName,
                  18: First_Name = reminderViewModel.FirstName,
                  19: Last_Name = reminderViewModel.LastName,
                  20: Email = reminderViewModel.Email,
                  21: Communications = reminderViewModel.Consent,
                  22: Event = new Guid(reminderViewModel.EventId)
                  23: };
                  24: using (new SecurityDisabler())
                  25: {
                  26: masterService.Create(destinationFolder, newUser);
                  27: }
                  28: }
                  29: }
                  30: return true;
                  31: }

                  This is an example of an item that has been created:


                  Posting Data From the Delivery to the Management Server

                  This is the magic method.

                  As it turns out, it's quite simple. All we are doing here is posting the model object back over to the exact same controller and action on the management server. You can see on line 4 where I am building the url to the controller's action.

                  On line 6, I created a clean DTO so that I didn't run into any issues when serializing my object to JSON.

                  Finally, I used the WebClient class' UploadData method to post my model back over to the management server as shown on line 14.


                  1:  public bool PostEventToManagement(ReminderViewModel reminderViewModel)  
                  2: {
                  3: //This will get executed if you are on a delivery (CD) server
                  4: var controllerUrl = $"{Settings.ManagementInstanceUrl}/api/mysite/forms/SubmitReminder";
                  5: //Create a clean DTO Object to send over
                  6: var reminderDTO = new {reminderViewModel.FirstName, reminderViewModel.LastName, reminderViewModel.Email, reminderViewModel.EventId, reminderViewModel.Consent};
                  7: using (var client = new WebClient())
                  8: {
                  9: client.Headers["Content-type"] = "application/json";
                  10: // serializing the reminderViewModel object in JSON notation
                  11: var jss = new JavaScriptSerializer();
                  12: var json = jss.Serialize(reminderDTO);
                  13: //Post to controller on cm
                  14: client.UploadData(controllerUrl, "POST", Encoding.UTF8.GetBytes(json));
                  15: return true;
                  16: }
                  17: }

                  Summary

                  With these pieces in place, we can summarize the events that follow after a user has completed their input and clicks the submit button:

                  Management Server Instance

                  If the setting indicates that we are on the management server, the object is passed to the CreateEventReminderMaster method where it creates the item in the master database.

                  Delivery Server Instance

                  If the setting indicates that we are on the delivery server, the object is passed to the PostEventToManagement method where is posts the model over to the management server where the process starts again.

                  Once on the management server, the object ends up in the CreateEventReminderMaster method where the item is created in the master database.

                  Final Thoughts

                  I hope that you find this concept useful as you start working on your own custom MVC forms that require you to make changes to the master database from all instances.

                  Please share your thoughts and comments.

                  Happy Sitecoring!


                  Setting up Sitecore's Geolocation Lookup Services in a Production Environment

                  $
                  0
                  0

                  Background

                  We have been working with Sitecore’s Business Optimization Services (SBOS) team for quite some time, helping one of our client's stretch the legs of the Experience Platform.

                  One of the tasks on the list included setting up Sitecore's Geolocation Service so that we could personalize based on the visitor's location. The SBOS team had some pretty slick rules set up on the Home Page of a site, where they switched out carousel slides and marketing content spots based on the visitor's location.


                  Sitecore Geolocation Lookup Service and MaxMind

                  There have been some changes with regards to the Geolocation / MaxMind set up because Sitecore launched IP Geolocation directly to their customers via the Sitecore App Center instead of going through MaxMind to use their service. Here is a link to Sitecore's documentation site that contains set up instructions, and how to migrate from MaxMind if purchased and have been working directly with them in the past:
                  https://doc.sitecore.net/Sitecore%20Experience%20Platform/Analytics/Setting%20up%20Sitecore%20IP%20Geolocation

                  Setup

                  After sifting through the documentation, we highlighted the following steps that needed to be completed in order to get up and running, and validate that things were indeed working:

                  1. Download and install the Geolocation client package from https://dev.sitecore.net/Downloads.aspx
                  2. Enable ALL configuration files in the CES folder
                  3. Whitelist geoIp-ces.cloud.sitecore.net and discovery-ces.cloud.sitecore.net
                  4. Test personalization
                  NOTE: Depending on your firewall, you may only have the option to whitelist by IP address. If this applies to you, you will need obtain the list of Azure IP addresses from the following link: Azure Datacenter IP Address Ranges. This is what happened to us, and I call tell you that the list is looooooooooooooong!!! Your network guy or gal will hate you!

                  Unfortunately for us, there was one piece of configuration that isn't documented. It so happened to be one of the most important pieces.

                  You will know what I am referring to as you read further along.

                  Testing

                  With all the pieces in place, we started testing our personalization.

                  Things worked beautiful on our Staging Server, but Production was a non-starter! So, as good detectives, we started our troubleshooting by looking at the differences between Staging and Production.

                  Load Balancer / Firewall / CDN woes

                  Our client uses Incapsula to protect their production websites. It does a great job protecting and caching their various site's to ensure optimal performance. It has however given us some grey hairs in the past when dealing with Sitecore's Federated Experience Manager. But, that's a story for another time.

                  The Incapsula CDN was the main difference between Staging and Production.

                  After running several tests with Fiddler and capturing packets using Wireshark, we were able to the determine that the Geolocation service was not obtaining the visitor's actual IP address. Instead, it was passing along Incapsula's IP address.

                  The reason for this was identified in the CreateVisitProcessor within the CreateVisits analytics pipeline. As you can see below, it was passing over the Request.UserHostAddress value.


                  This doesn't work when you are behind a load balance or proxy, as described by this article: http://stackoverflow.com/questions/200527/userhostaddress-gives-wrong-ips

                  Digging further, we discovered another interesting processor in the CreateVisits pipeline called XForwardedFor. Aha! As we know; the "...header field is a de facto standard for identifying the originating IP address of a client connecting to a web server through an HTTP proxy or load balancer."

                  Looking at the code below, you will notice that it's pulling in a setting, and if it's not empty, it is used as the key to obtain the value from the request's header NameValueCollection.


                  After digging around, and talking to support, we discovered the config file named Sitecore.Analytics.Tracking.config and setting below:

                  <!-- ANALYTICS FORWARDED REQUEST HTTP HEADER  
                  Specifies the name of an HTTP header variable containing the IP address of the webclient.
                  Only for use behind load-balancers that mask web client IP addresses from webservers.
                  IMPORTANT: If this setting is used incorrectly, it allows IP address spoofing.
                  Typical values are "X-Forwarded-For" and "X-Real-IP".
                  Default value: "" (disabled)
                  -->
                  <setting name="Analytics.ForwardedRequestHttpHeader" value="" />

                  Light at the end of the tunnel

                  After setting the value to "X-Forwarded-For" as shown below, the magical Geolocation based personalization started working like a champ!

                  <setting name="Analytics.ForwardedRequestHttpHeader" value="X-Forwarded-For" />

                  NOTE: We discovered that casing matters when setting the value. "X-FORWARDED-FOR"will NOT work. It needs to be set exactly like I have it above. For more information on this, you can read this Stack Overflow article:
                  http://stackoverflow.com/questions/11616964/is-request-headersheader-name-in-asp-net-case-sensitive


                  I hope that this information helps make your Sitecore IP Geolocation configuration go smoothly for your environment!

                  A special thanks to Kyle Heon from Sitecore for his support through this process.

                  How to Fix Missing Conditions in Engagement Plan Designer After Upgrading to Sitecore 8.x

                  $
                  0
                  0

                  Then and Now

                  Over the course of the last year, we upgraded a client's Sitecore instance from 6.6 to 8.0 Update-2.  I am pretty sure that we were probably the first in the country, if not the world, to get our client running on xDB Cloud.

                  There were definitely some bumps in the road, but things have been running pretty smoothly for us, and we have been starting to really see the benefits of the new experience platform.


                  Look Ma, No Conditions!

                  It wasn't until recently, when we started developing some pretty fancy engagement plans, that we discovered a new issue - when trying to set rules on Engagement Plan conditions, the dialog was completely empty!


                  Detective Mode Enabled

                  Lars and I started digging around the tree, and we discovered a legacy Marketing Workflows folder living in the rules location: /sitecore/system/Settings/Rules.


                  Digging deeper, we discovered that the Engagement Plan Condition Rule's Source field was pointing to one of the Marketing Workflows folders located at /sitecore/system/Settings/Rules.


                  We knew that we were onto something here, so I checked the links of the legacy Marketing Workflows folder. Presto! I discovered that the Engagement Plan Condition Rule's Source field was linked to it.


                  Out With the Old, In With the New

                  At this point, I decided to take an invasive approach by deleting the legacy folder. When I clicked the delete button, the Breaking Links dialog popped up. I selected "Link to another item" in the action options as shown below:


                  Next, I pointed the item that was linked to it to the proper Marketing Workflows folder:


                  Lift Off!

                  After changing the link to point to the proper Marketing Workflows folder, and removing the old folder, the rule set editor dialog was working again:


                  Thanks to Lars for helping get this issue resolved.

                  Sharing Razl Connections between User Profiles

                  $
                  0
                  0

                  Background

                  This is a quick post to demonstrate how you can share your Hedgehog Razl connections between various users who are logging into the same machine to sync content between environments.

                  I have been using Razl for quite some time, and can't say enough good things about the product. As Nikola Gotsev put is in his blog post, it is jewel that comes in handy to easily move the content between your various environments: http://sitecorecorner.com/2014/10/27/the-amazing-world-of-razl-part-1/.


                  Setting Up Connections

                  Our client purchased a copy of the software, and loaded it on their Staging server. We then had a developer set up the connections to each Sitecore instance in the various environments.

                  Within a few minutes, he could connect and sync content between 3 different environments with a few button clicks.

                  The Shared Connection Problem

                  The problem we were faced with was that non of the other developers could see the connections that the first developer had set up under his profile. Would we have to get each developer to set up the connections individually?

                  The Shared Connection Solution

                  I found the solution on Razl's FAQ page: http://hedgehogdevelopment.github.io/razl/faq.html

                  If you navigate to C:\Users\{username}\AppData\Local\Hedgehog_Development\Razl.exe_Url_????, you will see a user.config file that contains all the connection information.


                  So, to get the connections to show up for a new developer's profile, this is what you need to do:

                  1. Each user needs to run Razl once. This will create the "Hedgehog_Development\Razl.exe_Url_????" folder structure and user.config file in the location mentioned above.
                  2. Get a copy of the user.config of the developer that initially set up the connections and replace the file in each user's C:\Users\{username}\AppData\Local\Hedgehog_Development\Razl.exe_Url_???? location.
                  After this, when you they fire up Razl, the connections will show up.


                  Fix for Multiple Versions of Items being indexed from the Master Database

                  $
                  0
                  0

                  Background

                  This reared it's head on a project a couple months back - we were finding multiple versions of items that where being indexed from the Master Database.

                  After looking around on the web for a solution, I came across this post about inbound and outbound filter pipelines by the Sitecore Development Team: http://www.sitecore.net/learn/blogs/technical-blogs/sitecore-7-development-team/posts/2013/04/sitecore-7-inbound-and-outbound-filter-pipelines.aspx

                  The Disaster Waiting to Happen 

                  As Owen Wattley noted in his post, implementing the ApplyInboundIndexVersionFilter to ensure only the latest version goes into the index can cause problems that aren't apparent at first glance.

                  "...The problem my team found is as follows:

                  1. Create an item, version 1 goes into the index because it's the latest version 
                  2. Add a new version. Version 2 goes into the index because it's now the latest version. 
                  3. Version 1 gets blocked by the inbound filter, meaning the index entry for version 1 DOESN'T GET UPDATED OR REMOVED. In the index it is still marked as the latest version. So is version 2. This means you have 2 versions in your index, both marked as the latest version. 


                  You have to be very careful with inbound filters because they don't do as you might expect. I expected that if you set "args.IsExcluded" to true then it would REMOVE that entry from the index, but it doesn't - it ONLY ensures that nothing gets ADDED. That's a subtle but very crucial difference. Once we found this problem we quickly removed the inbound latest version filter. "

                  The Solution

                  Luckily, Sitecore star Pavel Veller recommended a solution that would help alleviate these issues. I just took his idea and implemented the solution.

                  As this keeps popping up time and time again in the Sitecore 8.x projects that I have been working on, I wanted to share this implementation with the community.

                  Hope it helps!

                  FilterPatchItemCrawler.cs


                  1:  using System;  
                  2: using System.Collections.Generic;
                  3:
                  4: using Sitecore.ContentSearch;
                  5: using Sitecore.ContentSearch.Abstractions;
                  6: using Sitecore.ContentSearch.Diagnostics;
                  7: using Sitecore.Data.Items;
                  8: using Sitecore.Diagnostics;
                  9: using Sitecore.Globalization;
                  10:
                  11: namespace FilterPatch.Library.ContentSearch
                  12: {
                  13: public class FilterPatchItemCrawler : SitecoreItemCrawler
                  14: {
                  15: protected override void DoAdd(IProviderUpdateContext context, SitecoreIndexableItem indexable)
                  16: {
                  17: Assert.ArgumentNotNull((object)context, "context");
                  18: Assert.ArgumentNotNull((object)indexable, "indexable");
                  19:
                  20: this.Index.Locator.GetInstance<IEvent>().RaiseEvent("indexing:adding", (object)context.Index.Name, (object)indexable.UniqueId, (object)indexable.AbsolutePath);
                  21: if (this.IsExcludedFromIndex(indexable, false))
                  22: return;
                  23: foreach (Language language in indexable.Item.Languages)
                  24: {
                  25: Item obj1;
                  26: using (new FilterPatchCachesDisabler())
                  27: obj1 = indexable.Item.Database.GetItem(indexable.Item.ID, language, Sitecore.Data.Version.Latest);
                  28: if (obj1 == null)
                  29: {
                  30: CrawlingLog.Log.Warn(string.Format("FilterPatchItemCrawler : AddItem : Could not build document data {0} - Latest version could not be found. Skipping.", (object)indexable.Item.Uri), (Exception)null);
                  31: }
                  32: else
                  33: {
                  34: using (new FilterPatchCachesDisabler())
                  35: {
                  36: SitecoreIndexableItem sitecoreIndexableItem = obj1.Versions.GetLatestVersion();
                  37: IIndexableBuiltinFields indexableBuiltinFields = sitecoreIndexableItem;
                  38: indexableBuiltinFields.IsLatestVersion = indexableBuiltinFields.Version == obj1.Version.Number;
                  39: sitecoreIndexableItem.IndexFieldStorageValueFormatter = context.Index.Configuration.IndexFieldStorageValueFormatter;
                  40:
                  41: this.Operations.Add(sitecoreIndexableItem, context, this.index.Configuration);
                  42: }
                  43: }
                  44: }
                  45: this.Index.Locator.GetInstance<IEvent>().RaiseEvent("indexing:added", (object)context.Index.Name, (object)indexable.UniqueId, (object)indexable.AbsolutePath);
                  46: }
                  47:
                  48: protected override void DoUpdate(IProviderUpdateContext context, SitecoreIndexableItem indexable)
                  49: {
                  50: Assert.ArgumentNotNull((object)context, "context");
                  51: Assert.ArgumentNotNull((object)indexable, "indexable");
                  52: if (this.IndexUpdateNeedDelete(indexable))
                  53: {
                  54: this.Index.Locator.GetInstance<IEvent>().RaiseEvent("indexing:deleteitem", (object)this.index.Name, (object)indexable.UniqueId, (object)indexable.AbsolutePath);
                  55: this.Operations.Delete((IIndexable)indexable, context);
                  56: }
                  57: else
                  58: {
                  59: this.Index.Locator.GetInstance<IEvent>().RaiseEvent("indexing:updatingitem", (object)this.index.Name, (object)indexable.UniqueId, (object)indexable.AbsolutePath);
                  60: if (!this.IsExcludedFromIndex(indexable, true))
                  61: {
                  62: foreach (Language language in indexable.Item.Languages)
                  63: {
                  64: Item obj1;
                  65: using (new FilterPatchCachesDisabler())
                  66: obj1 = indexable.Item.Database.GetItem(indexable.Item.ID, language, Sitecore.Data.Version.Latest);
                  67: if (obj1 == null)
                  68: {
                  69: CrawlingLog.Log.Warn(string.Format("FilterPatchItemCrawler : Update : Latest version not found for item {0}. Skipping.", (object)indexable.Item.Uri), (Exception)null);
                  70: }
                  71: else
                  72: {
                  73: Item[] versions;
                  74: using (new FilterPatchCachesDisabler())
                  75: versions = obj1.Versions.GetVersions(false);
                  76: foreach (Item obj2 in versions)
                  77: {
                  78: SitecoreIndexableItem versionIndexable = PrepareIndexableVersion(obj2, context);
                  79:
                  80: if (obj2.Version.Equals(obj1.Versions.GetLatestVersion().Version))
                  81: {
                  82: Operations.Update(versionIndexable, context, context.Index.Configuration);
                  83: UpdateClones(context, versionIndexable);
                  84: }
                  85: else
                  86: {
                  87: Index.Locator.GetInstance<IEvent>().RaiseEvent("indexing:deleteitem", (object)this.index.Name, (object)indexable.UniqueId, (object)indexable.AbsolutePath);
                  88: Operations.Delete(versionIndexable, context);
                  89: }
                  90:
                  91: }
                  92: }
                  93: }
                  94: this.Index.Locator.GetInstance<IEvent>().RaiseEvent("indexing:updateditem", (object)this.index.Name, (object)indexable.UniqueId, (object)indexable.AbsolutePath);
                  95: }
                  96: if (!this.DocumentOptions.ProcessDependencies)
                  97: return;
                  98: this.Index.Locator.GetInstance<IEvent>().RaiseEvent("indexing:updatedependents", (object)this.index.Name, (object)indexable.UniqueId, (object)indexable.AbsolutePath);
                  99: this.UpdateDependents(context, indexable);
                  100: }
                  101: }
                  102:
                  103: private static SitecoreIndexableItem PrepareIndexableVersion(Item item, IProviderUpdateContext context)
                  104: {
                  105: SitecoreIndexableItem sitecoreIndexableItem = (SitecoreIndexableItem)item;
                  106: ((IIndexableBuiltinFields)sitecoreIndexableItem).IsLatestVersion = item.Versions.IsLatestVersion();
                  107: sitecoreIndexableItem.IndexFieldStorageValueFormatter = context.Index.Configuration.IndexFieldStorageValueFormatter;
                  108: return sitecoreIndexableItem;
                  109: }
                  110:
                  111: private void UpdateClones(IProviderUpdateContext context, SitecoreIndexableItem versionIndexable)
                  112: {
                  113: IEnumerable<Item> clones;
                  114: using (new FilterPatchCachesDisabler())
                  115: clones = versionIndexable.Item.GetClones(false);
                  116: foreach (Item obj in clones)
                  117: {
                  118: SitecoreIndexableItem sitecoreIndexableItem = PrepareIndexableVersion(obj, context);
                  119: if (!this.IsExcludedFromIndex(obj, false))
                  120: this.Operations.Update((IIndexable)sitecoreIndexableItem, context, context.Index.Configuration);
                  121: }
                  122: }
                  123: }
                  124: }
                  125:

                  FilterPatchCachesDisabler.cs


                  1:  using System;  
                  2:
                  3: using Sitecore.Common;
                  4: using Sitecore.ContentSearch.Utilities;
                  5: using Sitecore.Data;
                  6:
                  7: namespace FilterPatch.Library.ContentSearch
                  8: {
                  9: public class FilterPatchCachesDisabler : IDisposable
                  10: {
                  11: public FilterPatchCachesDisabler()
                  12: {
                  13: Switcher<bool, DatabaseCacheDisabler>.Enter(ContentSearchConfigurationSettings.DisableDatabaseCaches);
                  14: }
                  15:
                  16: public void Dispose()
                  17: {
                  18: Switcher<bool, DatabaseCacheDisabler>.Exit();
                  19: }
                  20: }
                  21: }
                  22:

                  Your index configuration:


                  1:  <locations hint="list:AddCrawler">  
                  2: <crawler type="FilterPatch.Library.ContentSearch.FilterPatchItemCrawler, FilterPatch.Library">
                  3: <Database>master</Database>
                  4: <Root>#Some path#</Root>
                  5: </crawler>
                  6: </locations>

                  Official Fork of the Improved 301 Redirect Module

                  $
                  0
                  0

                  After chatting with Chris Adams about my recent contributions to the improved version of the 301 redirect module (Original version was created by Chris Castle, available on the Marketplace), and the launch of version 2.0, we decided that I would be taking over the maintenance of the module. So if you have any questions or run into issues, you can inbox me at menglish@arke.com or reach out to me on Twitter: @MartinREnglish.


                  The new repository url is: https://github.com/martinrayenglish/301RedirectModule

                  Some improvements you will see in version 2.0 include:

                  Ability to handle redirects for non-Sitecore hostnames
                  • New setting for pipe separated list of non-Sitecore hostnames that are bound in IIS that you want to allow redirects from. Eg. "mydomain.org|www.myotherdomain.org"
                  • New setting to redirect external host names where there is no match found, to a specific URL

                  Ability to redirect to relative destination paths using the redirect pattern. Eg:
                  • Requested URL: http://www.mydomain.org/nice/blog/2015/12/1
                  • Regex match for “^/nice/blog/?”
                  • Redirect to http://nice-blog.myotherdomain.com/ set
                  • Redirect will go to http://nice-blog.myotherdomain.com/nice/blog/2015/12/1

                  Geolocation Redirects using MaxMind
                  • Ability to use MaxMind’s GeoIP2 Database or GeoIP2 Precision Services to determine visitor location, and redirect to specific URLs if a location match based on ISO Country Code or Continent code is found.

                  Caching layer for Geolocation Redirects
                  • This was introduced to improve performance of Geolocation lookups


                  Hope that community benefits from the improvements!

                  Viewing all 81 articles
                  Browse latest View live